Dr. Uchiyama’s Course Set
 Dr. Uchiyama Course 01Visualized Treatment system (All Videos)
This video includes all of the following videos from Course01 Visualized Treatment system.
[#1 Importance of visualization]
This course explains the importance of visualizing the treatment process with photographs and videos.
The benefits of visualization include
- Reevaluation of one's clinical practice
- Cooperation with other departments
- Smooth communication with dental technicians
- Patient explanation
However, it is difficult to manage photos and videos.
Therefore, Dr. Uchiyama introduces Information management systems that he actually implements in his clinic.
By combining multiple applications, Information management can be achieved with minimal cost, time, and stress.
Eye-fi"" introduced in the video is no longer in production.
keenai"" shown in the video has been discontinued.
[#2 Importance of information Sharing]
In this video we present the following points
Taking pictures
Sharing photos
Checking on a chairside monitor
Combining multiple software programs
This step enables more efficient visualization to the patient.
In addition, by establishing information management systems, images, videos, and CT data can be shared, and conferences for interdisciplinary approaches can be held online.
[#3 Information management systems]
Just taking pictures and importing them to a PC does not mean that the pictures will be organized into folders for each patient. He explained the systems that should be implemented at the time of opening a clinic, such as the construction of a Wi-Fi environment and image management methods for each patient.
If you look closely at the photos you take on your PC, you may discover mistakes that you don't notice on the spot, such as debris on the mirror or a large angle wiper in the image. We also discuss how to correct such images using free software. Dr. Uchiyama Course 02Counseling and Consultation (All Videos)
This video includes all of the following videos from Course02 Counseling and Consultation.
[#1 Importance of Consultation]
Explanation to the patient is essential to any treatment.
Most patients visiting a dental clinic are nervous. He told us about the clinic's interior design concept, the layout of the counseling room, and other aspects of creating an environment where patients feel comfortable coming to the clinic and where they can discuss their concerns in detail.
He also shares some episodes from his time as a practicing dentist about what to keep in mind when providing medical care.
[#2 Value of Dental Treatment.]
No matter how much time or how many times you spend explaining in detail, showing actual case photos will help patients understand better.
Dental treatment is not only about the moment of the procedure. Dr. Uchiyama also talked about how he came to think about hospitality and the factors that constitute the quality of dental treatment. We also have an easy-to-understand explanation of Dr. Uchiyama's thoughts on appointments.
[#3 Advantages of Long Appointments]
After examination and diagnosis, it is important to make appointments for efficient treatment planning. To solve such a dilemma, Dr. Uchiyama told us how he thought about and made appointments when he was a working doctor, and how he interpreted them.
In the latter half of the lecture, he shows us a case study from his working days and discusses about the hygienists he worked with and how he felt when he took charge of one patient for the first time.
[#4 Counseling & Consultation 1]
Counseling and consultation are extremely important in determining a treatment plan. The lecture explained the interpretation of counseling, necessary materials, and who explains what, based on actual cases.
In the latter half of the lecture, he also explains how the specific explanations are given and recommends equipment.
[#5 Counseling & Consultation 2]
He explained how he describes the current status of the oral cavity during the consultation.
Based on the information obtained through the use of many documents, a treatment plan is developed. By always considering the best plan for any case, the patient's opinions and wishes are incorporated, leading to the development of the final treatment plan.
[#6 Importance of Case Presentations]
Dr. Uchiyama has given case presentations in numerous occasions to date. He talked about the importance of keeping documents on a regular basis and what is gained by presenting cases.
When the problems are highlighted and the actual treatment is started, where does Dr. Uchiyama start his intervention? He explains how far he goes in one treatment with actual case videos.
[#7 How to Connecting Referrals]
Attracting patients is extremely important for the stable management of a dental practice. Although it is very common to receive patients via the Internet, referrals from existing patients are necessary to further increase the number of patients.
Dr. Uchiyama told us about an example of a clinic where the majority of patients come to the clinic through referrals.
You will also learn about the importance of consultation and what has happened to his patients from the time he was working as a doctor to the present. Dr. Uchiyama Course 03Microscope (All Videos)
This video includes all of the following videos from Course03 Microscope.
[#1 Advantages of Microscopes]
Do you think that the microscope is a tool for specialists who use it for treatments performed by specialists? According to Dr. Uchiyama, it is a necessary tool for generalists who can use it for any kind of treatment.
He told us about his encounter with the microscope and the changes that have occurred in his practice and body since he started using it in his clinical practice.
He also talks about the method he actually uses in his clinical practice from each point of view on the issue of whether the mirror technique is better or the direct view is better.
[#2 Vision Control in EXTARO 300 ]
Although we tend to focus on the ease of use of microscopes, such as magnification and handling, it is also necessary to know about the type of light source. He explained in detail the differences in visibility between xenon, halogen, and LED light sources.
He said, "When you use a microscope, you can simply see and fill the root canal there and it will be cured. That's all there is to it. That's all there is to it," said Dr. Uchiyama. You should not miss the actual clinical video of a root canal, which is difficult to see in the dark, taken with a microscope.
He also talks about a difficult case of root canal filling of a mandibular molar.
[#3 How to record movies with EXTARO 300]
When recording photos or videos of a microscopic examination, not just any camera will do. It is necessary to understand the features of the microscope and the features of the camera equipment, and to choose a combination that makes the best use of both.
In this session, we talked about the functions and features of microscopes, as well as the minimum camera functions you should know.
[#4 Microscopes and rubber dam]
Don't you think that rubber dams are just for performance and don't affect your clinical practice with or without them?
There was a time when Dr. Uchiyama himself actually did not use them. However, he now uses rubber dams in all cases when he can. He summarized the advantages of using rubber dams and how to prepare them in advance.
He also discussed how to form the abutment teeth with a microscope and how to create a provisional restoration. Please also pay attention to Dr. Uchiyama's focus on how to eliminate bleeding from the gingiva.
[#5 Advantages of rubber dam 1]
When rubber dam protection is used in restorative treatment, it is necessary to drill holes with a certain degree of vigor. Dr. Uchiyama has made it more efficient by using the same drilling method for anterior teeth, molars, and root canal treatment. In the first half of the lecture, he talked about the drilling and fixing methods and the use of floss to fix the rubber dam firmly in place.
In the second half of the lecture, he discussed a difficult case in which the gingiva was black and transparent due to root staining, and esthetically restored the tooth using a microscope and a rubber dam.
[#6 Advantages of rubber dam 2]
In the first half of the presentation, he discussed tips for molar rubber damming to ensure a good target tooth while maintaining a good field of view. The method of fixation without the use of clamps is very useful and improves operability and field of view.
In the latter part of the lecture, he taught us how to directly construct the abutment without grinding or extracting the tooth for anterior teeth with low crown height diameters due to living teeth. The best results can be achieved by understanding the characteristics of the materials used and selecting and treating the appropriate cases.
[#7 Bonding with microscope]
This is a CR restoration using a microscope and rubber dam. Using actual microscopic cases, he taught us how to do plaque out and how to remove excess resin, and he explained each step in detail, mentioning recommended instruments and materials.
When extraction is performed under the microscope, it is easy to see the difference between the bone surface, soft tissue, and even the defective granulation during curettage of the extraction socket.
This video shows the importance of preoperative CT diagnosis and the importance of anticipating post-extraction treatment. Dr. Uchiyama Course 04Anesthesia (All Videos)
This video includes all of the following videos from Course04 Anesthesia.
[#1 Pain-free infiltration anesthesia]
Infiltration anesthesia is one of the most patient-unfriendly medical procedures, even though it is performed for most dental procedures. We want to reduce the burden on patients as much as possible.
In #1, he carefully explains the pharmacological effects and physiological characteristics of infiltration anesthesia and analyzes the reasons why patients do not like it in actual clinical practice and the countermeasures against it.
[#2 Various methods of infiltration anesthesia]
Do you have trouble with patients who have difficulty with infiltration anesthesia?
In #2, you have an explanation focusing on the actual method of administering it. Using diagrams and actual clinical videos, he explains in an easy-to-understand manner the countermeasures to be taken when there is inflammation in the tissues, points to keep in mind for mandibular foramen transfer anesthesia, and positioning methods, so you can immediately apply the content in your clinical practice from tomorrow.
[#3 Various methods of administering transmissible anesthesia]
#3 is the application of transfer anesthesia. If you have the knowledge and skills to provide transfer anesthesia to the infraorbital foramen, incisal foramen, and foramen magnum, you can provide a more painless treatment during surgical procedures in the maxilla. You will learn the anatomical features, the range of effects that can be given, and how to actually do it.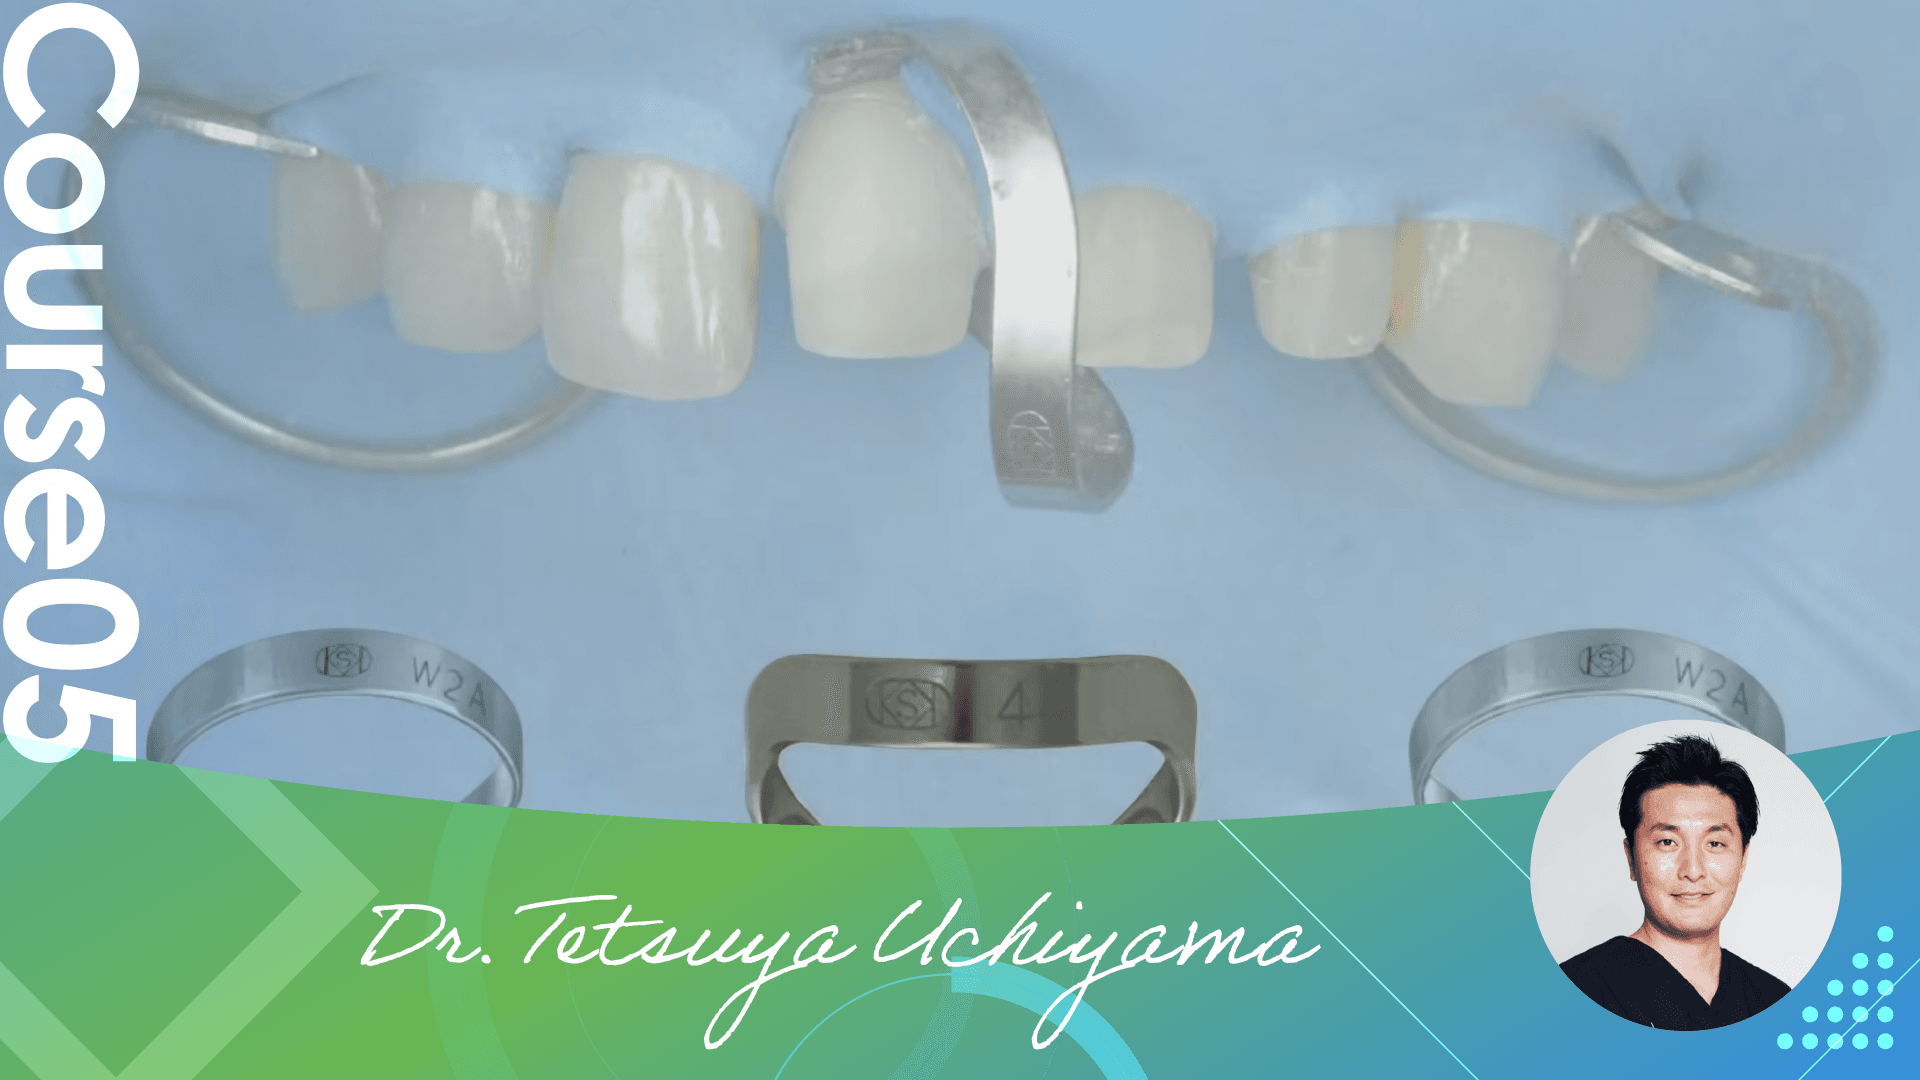 Dr. Uchiyama Course 05Rubber Dam Isolation (All Videos)
This video includes all of the following videos from Course05 Rubber Dam Isolation.
[#1 Micro Rubberdam Isolation Systems(M.R.I.S)]
Some doctors may say, "I don't use rubber dam dam-proofing and microscope except for root canal treatment.
In his daily clinical practice, Dr. Uchiyama uses micro and rubber dam to improve the accuracy of treatment.
He talked about the knowledge and techniques to achieve this and the advantages of M.R.I.S. with clinical videos.
[#2 Combined use of pressure-discharge code]
He explained the technique to control gingival indentation and bleeding with high accuracy by using both rubber dam dam dam and pressure drainage code.
Especially, the technique to deal with "cases where it is difficult to apply rubber dam after crown removal" will be immediately useful in daily clinical practice. Dr. Uchiyama's clinical video by micro is outstanding and the content is designed to expand the range of the use of rubber dam dam protection. Please take a look.
[#3 drop cone technique]
He explained about the types of sheets and clamps used in rubber dam damming and the position of drilling holes.
It is said, "To be good at it, you must first have good tools." In this video, Dr. Uchiyama introduced the tools that he actually uses, which is very helpful.
If you are going to start rubber damming from now on, you will be able to get closer to the step-up if you have the minimum kinds of tools introduced in this video.
In the latter half of the article, he explains how to apply the rubber dam dam protection in the case of anterior teeth. Please take a look.
[#4 Efficient clamping for therapeutic purposes]
The anterior teeth direct bonding under M.R.I.S was explained in the clinical video using a microscope.
We can learn the ingenuity of Dr. Uchiyama in his daily clinical practice, such as grinding with a scalpel blade during the formation process and the application of rubber dam according to the treatment purpose.
Especially, the "split dam" method, which is very efficient in the treatment of anterior teeth, will surely be useful in daily clinical practice.
You can learn not only the basic method but also "how to apply rubber dam effectively and efficiently" in a short time. Please take a look.
[#5 split dam technique]
He mainly explained about molar treatment under M.R.I.S. In the first half of the lecture, he talked about split dam in anterior teeth and direct bonding for acid erosion.
In the first half, he talked about split dam in anterior teeth and direct bonding for acid erosion.
In the middle and the latter half of the video, he explained how to apply the rubber dam on the molars and how to use it according to the content and purpose of the treatment.
The video is designed to help you learn how to apply the rubber dam together with the previous video. Please take a look.
[#6 Rubber dam and pressure drainage threads during ceramic restoration]
He explained about ceramic restoration and direct bonding.
The first half of the lecture was about ceramic restorations using both pressure-discharge threads and rubber dams. By using the rubber dam at the time of setting and also using the compression thread, we can learn the clinical practice of Dr. Uchiyama who pursues more accurate bonding.
In the case presentation in the latter half of the lecture, he explained the anterior direct bonding by M.R.I.S. step by step.
By the explanation using actual clinical videos, you can learn Dr. Uchiyama's technique as if you were watching it up close. It is an impressive case presentation that leads to the next video.
[#7 direct bonding]
Continuing from #6, this lecture is about anterior direct bonding.
He explained the actual filling operation and the importance of checking with multi-directional view when using the microscope.
Also, the finishing operation is very helpful.
Finally, as a summary, Dr. Uchiyama talked about his thoughts on treatment planning and how he should be as a dentist.
After watching the lecture, you will be able to start your daily clinical practice with a fresh mind.
I would like all doctors to watch this lecture. Dr. Uchiyama Course 06BASIC Bonded Restoration 1 (All Videos)
This video includes all of the following videos from Course06 BASIC Bonded Restoration 1.
[#1 Bonded Restoration, the advantages of using micro for bonding]
The recent development and evolution of materials has made bonding more complex, and it is difficult to know what to use for indirect restorations as well. First of all, he talked about the clinical selection criteria of CR, inlay, or table top venner, based on the evidence of physical properties.
[#2 Enamel Preservation & Selective Etching, clinical case (caries removal)#3 Composite Resin Filling, clinical case (resin filling)]
In resin filling, bonding is a very important step to determine the prognosis of treatment. Dr. Uchiyama introduces the advantages of Selective Etching and the instruments and materials he uses for caries removal and bonding pretreatment, citing the literature.
In the latter half of the video, Dr. Uchiyama talks about the recent transition of the bonding system, including his episodes about the complexity of the former bonding system. Please check the video.
[#3 Composite Resin Filling, clinical case (resin filling)]
Although the 2-step system is superior to the 1-step system in terms of bond strength, this does not mean that the 1-step system is useless. He explains the cases in which the universal system should be used.
It is not only the bonding system that has developed in recent years. The physical properties of composite resins have also made great strides, with some flow-type products having physical properties superior to those of pastes. Among such composite resins, Dr. Uchiyama introduces his favorite products.
Please enjoy the detailed explanation of the physical properties of the most frequently used composite resins and watch the video of Dr. Uchiyama's resin filling operation.
[#4 Bulk Fill, Clinical case (lining to resin filling)]
In the past, it was a major idea that free enamel should be removed when removing caries, but with the development of dental materials and the spread of the concept of MI, it has become possible to preserve tooth structure by performing Bulk Fill.
Dr. Uchiyama introduces the products suitable for Bulk Fill and also explains in detail the irradiation depth of the irradiator, which varies greatly depending on the product. Please take a look at the videos of a series of cases to see how each product is used.
[#5 Tunneling Technique, clinical case (retreatment of adjacent CR)]
Although the magnified field of view provides a much better view than the naked eye, there are some points to keep in mind.
In the first half of the video, you can see the points to keep in mind when filling under such a microscope, as well as morphological correction, occlusal adjustment, and polishing.
In addition, the main points of the Tunneling Technique, which is used without destroying the occlusal surface morphology, are explained in the video.
The second half of the video shows the retreatment of CR on adjacent surfaces, which is often seen in clinical practice.
The video also includes tips on infiltration anesthesia and techniques for removing subgingival caries.
[#6 Clinical case (Retreatment of adjacent CR), strength of Composite Resin]
Every dentist has experienced the guttation of a caries during removal. Even in such cases, there is no need to panic if the procedure is performed under a rubber dam.
In the video, he explains the key points of the MTA cement covering, the subsequent bonding operation, and the filling sequence. In a series of videos, you can see the process from pre-treatment to filling, occlusal adjustment, and polishing. Please take a look. Dr. Uchiyama Course 07BASIC Bonded Restoration 2 (All Videos)
This video includes all of the following videos from Course07 BASIC Bonded Restoration 2.
[#1 CR restoration or inlay restoration or table top venner]
The recent development and evolution of materials has made bonding more complex, and it is difficult to know what to use for indirect restorations as well. First of all, he talked about the clinical selection criteria of CR, inlay, or table top venner, based on the evidence of physical properties.
[#2 Selective Etching, Bulk Fill, Clinical Example (Inlay Restoration)]
What about inactive teeth? There is a big difference in prognosis between anterior and molar teeth. Then, I will explain the inlay restoration using actual cases.
First of all, he reviewed the superiority of rubber dam, which is mentioned in CR, and then he talked about the points when removing the rubber dam and the instruments and methods actually used by Dr. Uchiyama. He also explained the usefulness of selective etching and BulkFill.
[#3 Composite Resin Filling, clinical case (resin filling)]
In #3, we start with a case in which Bulkfill was actually performed under magnified view, and then we discuss the acid treatment as a pre-treatment. Then, cementation is one of the problems in indirect restorations. Based on clear evidence, Dr. Uchiyama uses CR and resin cements for restorations, and he uses them differently depending on the case.
[#4 Cementation, clinical case (inlay restoration)]
This is the actual cementation. He talks about everything from infiltration anesthesia to pretreatment and cementation. He also explains in detail what to check when setting.
[#5 Table top venner, clinical case]
This is an actual case of table top veneer restoration. He explains the diagnostic diagnosis and characteristic BulkFill, and you can also see the efficient probing fabrication.
[#6 Clinical case (Table top veneer)]
Actual bonding. He explained the process from selective etching as a pretreatment, cementation using CR, occlusal adjustment, and polishing, using case examples. He showed that one of the difficulties in table top veneer restoration is the position and height of the occlusal contact point, and that communication with the technician is important. Dr. Uchiyama Course 08Advanced Bonded Restoration (All Videos)
This video includes all of the following videos from Course08 Advanced Bonded Restoration .
[#1 Advanced bonded restoration with little or no tooth reduction]
The anterior region has particularly high esthetic demands from the patient, and shade selection is more severe when restoring in resin.
He explained the three factors in determining shade and discussed them in the case photos.
In the latter half of the presentation, he explained the characteristics of Empress Direct, which approximates the color characteristics of natural teeth, and also explained the actual cases treated with Empress Direct.
The last part of the presentation is a case from the time when Dr. Uchiyama was a practicing dentist, and he explains the case with some episodes from those days. Please take a look.
[#2 Importance of Anterior Guidance]
Anterior guidance is a very important and fundamental element in the construction of occlusion. Lack of anterior guidance causes problems not only in the oral cavity but also in the whole body.
In this presentation, he showed a case in which the cuspid guidance was missing, and by constructing the cuspid guidance with CR, not only the occlusion but also the physical problems were improved.
In addition, in a case with a low occlusion, the diagnosis was made using a face bow, and based on the results of the diagnosis, provisional bonding was performed. Please take a look.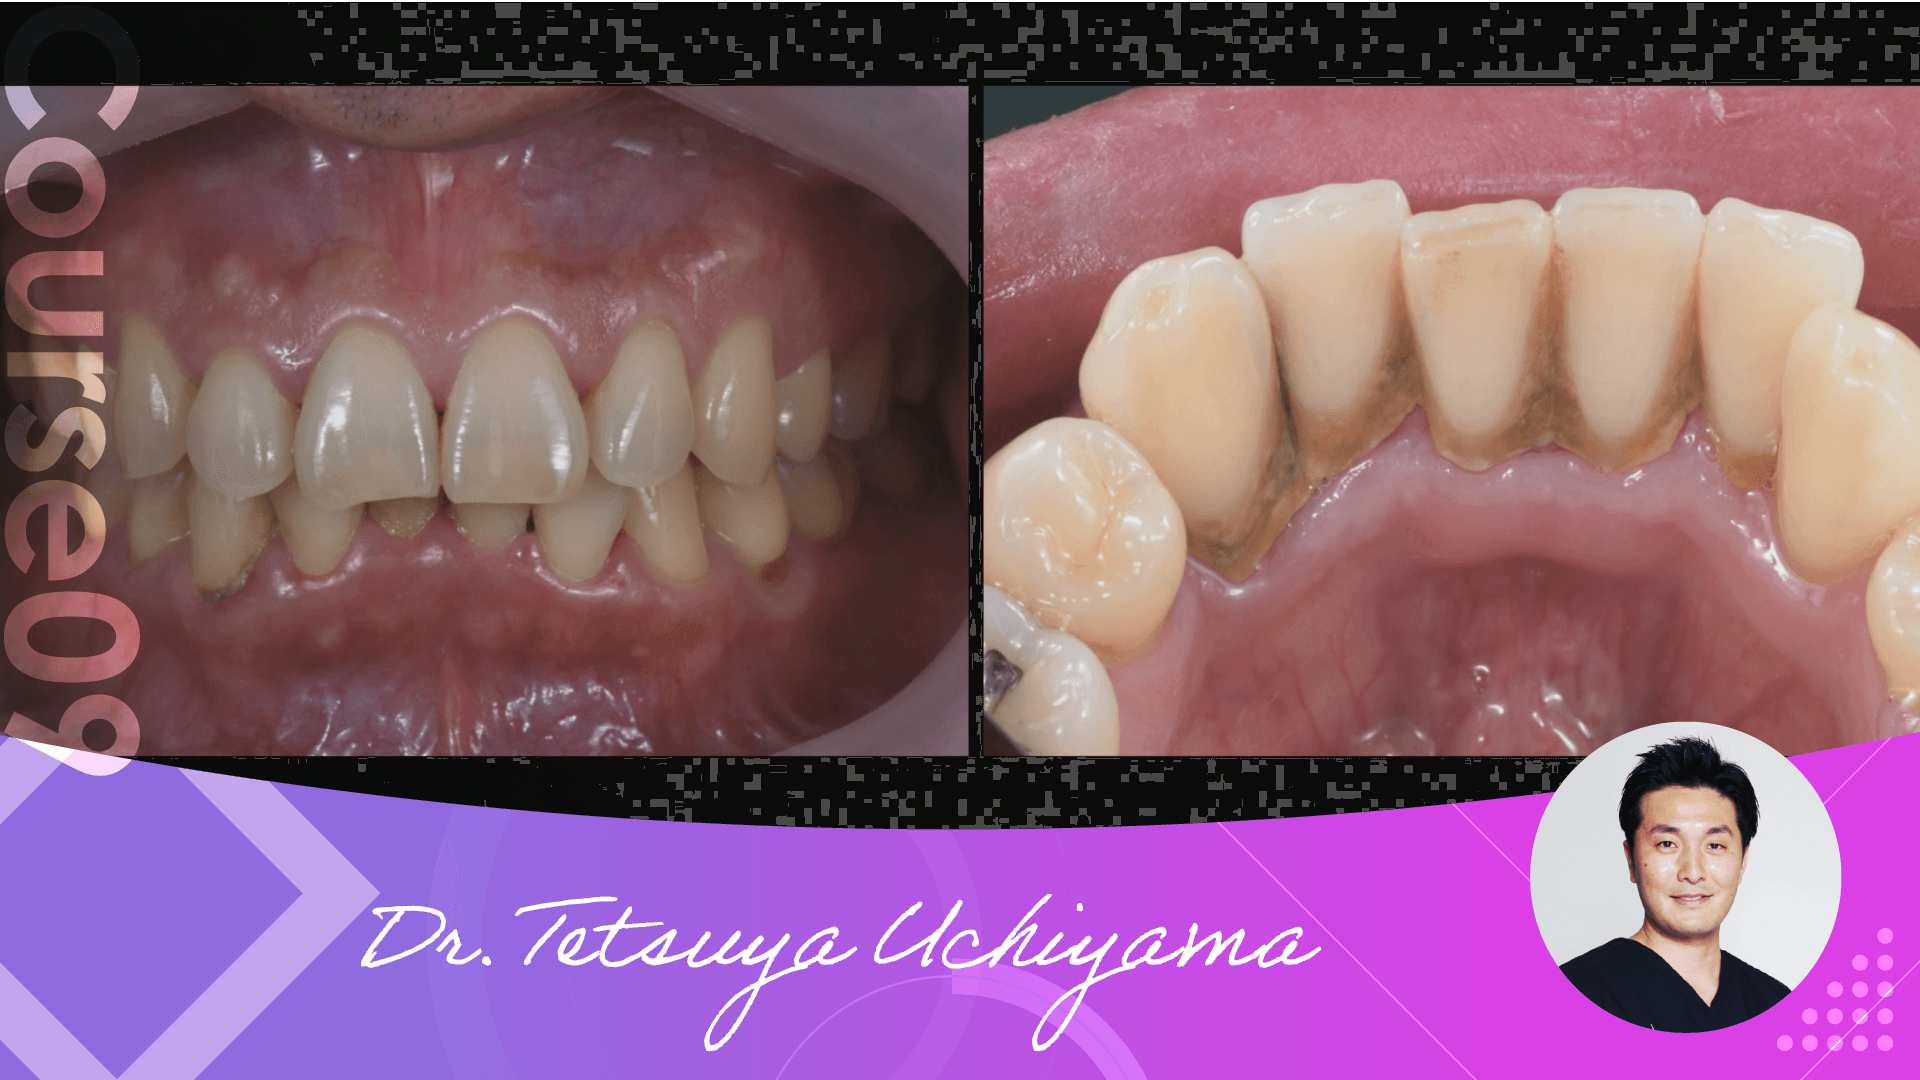 Dr. Uchiyama Course 09Crown lengthening and Extrusion (All Videos)
This video includes all of the following videos from Course09 Crown lengthening & Extrusion.
[#1 Understanding the Dentogingival Complex]
Gingivitis and periodontitis are caused by various reasons, but it is necessary to correctly diagnose why inflammation occurs and take appropriate measures.
He presented cases with different causes of gingivitis, and explained the initial treatment and cases caused by occlusion after understanding the Dentogingival Complex.
[#2 Inflammation Control]
If the gingiva bleeds due to gingivitis or periodontitis, or if the gingiva is accidentally injured and bleeds during the procedure, bonding operations and restorative procedures cannot be performed properly.
The use of a rubber dam prevents blood from entering the surgical field and eliminates the risk of damaging healthy gingiva.
In the video of the actual procedure, he explains the advantages in detail and also discusses a case in which a rubber dam cannot be applied due to a residual root condition.
[#3 Facing Hemostasis]
Crown lengthening procedure can be broadly divided into two methods: lateral root shifting and gingival excision, but how should we diagnose and select the right one?
From a review of the GingivalComplex, he explains the diagnostic criteria based on a case using the Widman Improved Method.
[#4 Diagnostic Criteria]
This is a review of the second molar cases mentioned in #3 and the diagnostic criteria.
He also goes into depth on the importance of securing the ferrule to obtain a good prognosis.
[#5 Tooth Extrusion]
In #5, you can see the first crown lengthening and tooth extrusion case that Dr. Uchiyama performed.
Dr. Uchiyama invented the device used in toothextrusion for this case, and also did the wax-up and casting himself.
This case was done in his second year of clinical practice, so you can learn not only the content but also how to deal with patients and dental care as a dentist.
[#6 The case - Short root]
What should be done if the root of the tooth to be treated with tooth extrusion is short?
In this article, he explains a case in which crown lengthening and tooth extrusion were actually performed on a maxillary left first premolar with a short tooth root.
[#7 Suture and Final]
Finally, from suturing to retention, removal, and Final. He also discusses the diagnostic and selection criteria from various requirements not for individual teeth but for the whole jaw. You will learn how to actually remove and retain devices and what to focus on, which cannot be learned only from the knowledge of retention intervals and indications.
[#8 Diagnosis in the aesthetic field]
This is crown lengthening and tooth extrusion with multiple teeth in the maxillary anterior teeth. You will learn not only how to secure the ferrule, but also what to focus on in the esthetic field, such as the gingival line, and how to deal with it.
[#9 Crown Length Rings and Provisional Restorations]
This is crown lengthening and tooth extrusion with multiple teeth in the maxillary anterior teeth. You will learn not only how to secure the ferrule, but also what to focus on in the esthetic field, such as the gingival line, and how to deal with it.
[#10 Provisional Restorations and Prosthetics]
Learn what to look for in provisional restorations and how to match the color tone and form of laminate veneers, prosthetics, and natural teeth.
[#11 Occlusion and Crown Lengthening]
This course is about crown lengthening for difficult cases with occlusal problems.
You will learn about the treatment sequence, methods, and diagnostic criteria. It is a review of the past and focuses on provisional restorations. Please take a look!
[#12 All-round case]
Learn about perio, occlusion, ferrule securement, how to approach cases with a variety of problems and provisional restorations. Dr. Uchiyama Course 10Abutment Construction (All Videos)
This video includes all of the following videos from Course10 abutment construction.
[#1 Direct and indirect methods]
In our daily clinical practice, we rarely see an inactive tooth.
In most cases, core construction is required after root canal filling or restoration of an inactive tooth, and this book explains the incidence of problems with metal cores, resin cores, and fiber cores, citing the papers. He also explains the advantages and disadvantages of the direct method and cases in which the indirect method should be used.
[#2 Crown removal to bulkhead formation]
Continuing from #1, he explained the timing of core construction from the perspective of infection using the paper and described the best time to perform the construction.
Then, in the actual video, he explains in detail the series of steps from crown removal, caries treatment of adjacent teeth discovered incidentally, bulkhead, and formation.
[#3 Causes of root apex lesions]
The incidence of MB2 in maxillary #6 is quite high and can be difficult to detect with the naked eye.
Please present your own past cases and see how Dr. Uchiyama was able to pursue the cause of the problem by using CT and microscope due to the change in his past and present practice style.
[#4 Situations where rubber dam cannot be applied]
When starting root canal treatment, you may encounter many situations where you cannot clamp the rubber dam because of the residual root after removing the core and caries.
In the video of the actual treatment, he explains the steps from the formation of the bulkhead to the creation of the provisional restoration, and also explains the key points of each step.
[#5 Cases to be saved or not]
Continuing from #4, this video shows the treatment steps from root canal treatment after septal formation to root canal filling and provisional restoration.
The latter half of the case is also a very difficult case to decide whether to treat or not, but Dr. Uchiyama chose to preserve it and explains in detail the steps leading up to the root canal filling. Dr. Uchiyama Course 11Comprehensive Abutment Procedure 1 (All Videos)
This video includes all of the following videos from Course11 Comprehensive Abutment Procedure1.
[#1 Comprehensive abutment procedure overview case presentation (minimal formation for non-prosthetic teeth)]
In the #1 video, he first explained the concept of the comprehensive abitment procedure.
In the past, the amount of abutment formation was often too large for esthetic prosthetics, but with the advent of Monolithic Ceramic, it has become possible to reduce the amount of abutment formation. This presentation explains this point through clinical cases, including papers.
[#2 Digital Dentistry enabling thinnest provisionals Abutment treatment guidelines for erupted teeth Case presentation (importance of micro)]
The #2 video explains the treatment process with the CAP concept through a case of restoration of four anterior teeth. During the course of the video, he explains how to fabricate uniform thickness provisionals in advance using CAD/CAM. The CAP concept requires the use of a microscope. The video of the actual microscopic formation is used to explain why microscopic procedures are necessary.
[#3 Case Presentation (Case with CAP) Core removal method Bonding]
The #3 video first explains the reason for the direct method of fiber post & core.
It then explains the treatment with the CAP concept through case examples.
The video explains the removal of metal cores and checkpoints for bonding operations in the fabrication of bulkheads.
[#4 About abutment tooth formation and root canal filling About Internal Bleaching]
In the video #4, he first explains the checkpoints during the formation of abutment teeth under the microscope.
After that, he explains the technique of internal bleach for inactive and discolored teeth.
The relationship with the dentin tubules is also explained in detail, and the detailed techniques such as the block-out technique and how far to insert the drug are all explained based on the video using the microscope.
[#5 Methods of resin core and abutment tooth formation Formation]
Video #5 is a continuation of #4. Almost the entire video is explained by microscope.
From the fiber post and core after internal bleach, to the formation of the abutment tooth according to the CAP concept, the adjustment of the provisional, and the final formation, all are explained in the video.
The comparison pictures of before and after treatment show that the CAP concept treatment shows good results.
[#6 Case Presentation 2 (Comprehensive Dentistry with CAP)]
The #6 video is an explanation of a case that has been completed and is now in progress.
The video explains the entire process from the initial examination, to the approximate formation of the prosthesis with the compression threads, detailed explanation of the split dam technique, removal of the fiber post and core, internal bleach, construction of the fiber post and core again, and the final prosthetic placement. The video explained the entire process.
[#7 Case Presentation 3 (approach to a hopeless tooth with no ferrule and coloration)]
The video #7 explains a case in which the CAP concept was used to treat a tooth without ferrule using the technique we have been explaining so far.
In this case, we used extrusion, and the entire process from the installation of the device to the crown lengthening procedure and removal of the device is explained in the video under the microscope.
After that, as in the previous case, we will install the septum wall, form it, and adjust the provisional, all of which are also explained in the video.
[#8 Root Canal Filling of Case Presentation 3 - Final]
Video #8 is a continuation of #7.
As in the previous case, the video explains the entire process from internal bleach, construction of the fiber post & core, and final formation of the abutment teeth, all under the microscope.
He explained in detail the comparison between the initial and final prosthetic examinations, the preoperative and postoperative evaluations, and the advantages of the CAP concept for treatment.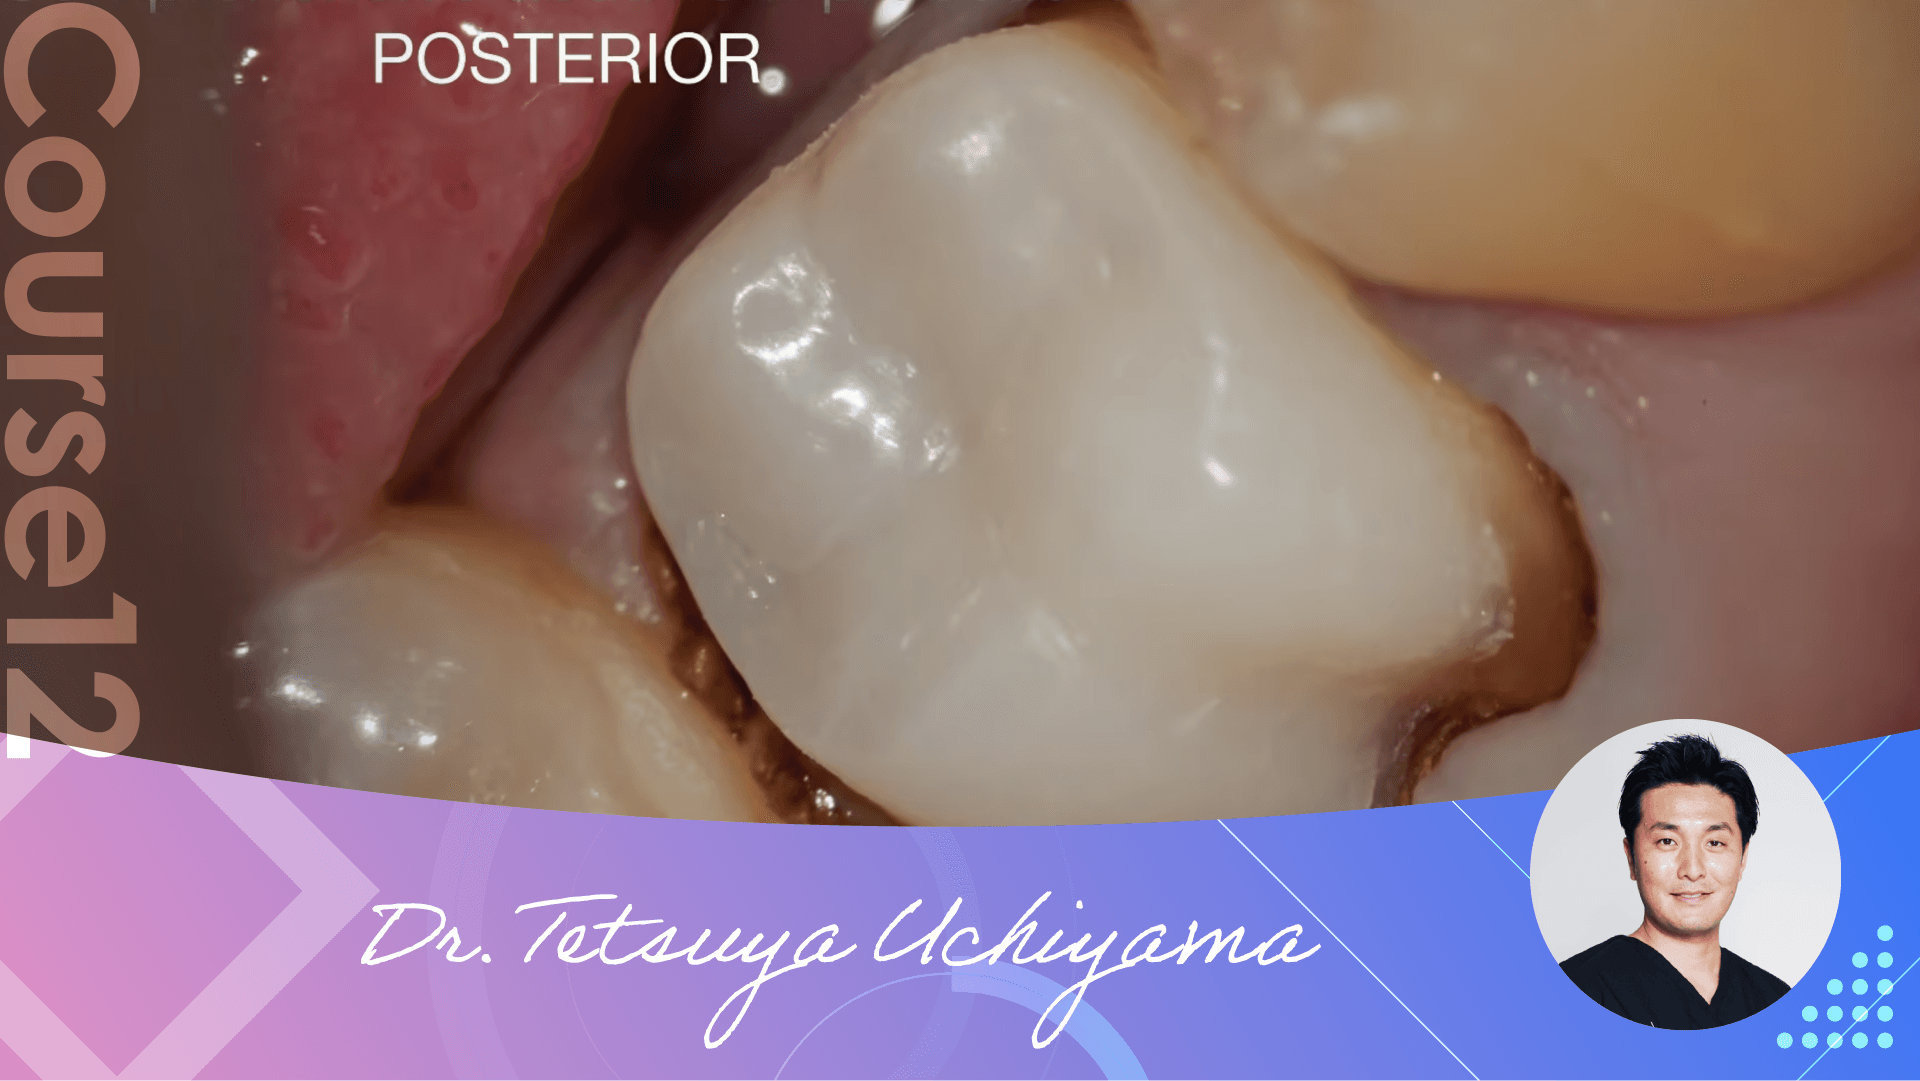 Dr. Uchiyama Course 12Comprehensive Abutment Procedure 2 (All Videos)
This video includes all of the following videos from Course12 Comprehensive Abutment Procedure 2.
[#1 Comprehensive Abutment Procedure on Molars]
The #1 video first briefly reviews the concept of the Comprehensive abutment procedure, which was also explained in the anterior section. After that, the actual treatment is explained in a flow chart. The video explains the entire process, from the removal of the rubber dam, removal of the crown core, and caries treatment of the treated tooth and adjacent teeth, to the creation of the bulkhead and preparation of the environment for root canal treatment, all using a microscope. The reasons for removing the crowns and cores after rubber dam damming and the data on bonding are also explained in detail.
[#2 Caviton to CAP day2 and beyond Treatment flow from RCT to core]
The #2 video shows the formation based on the CAP concept after the creation of the septum, the adjustment of the provisional, the root canal treatment, the bonding operation in the post and core, and the state of the final abutment tooth formation.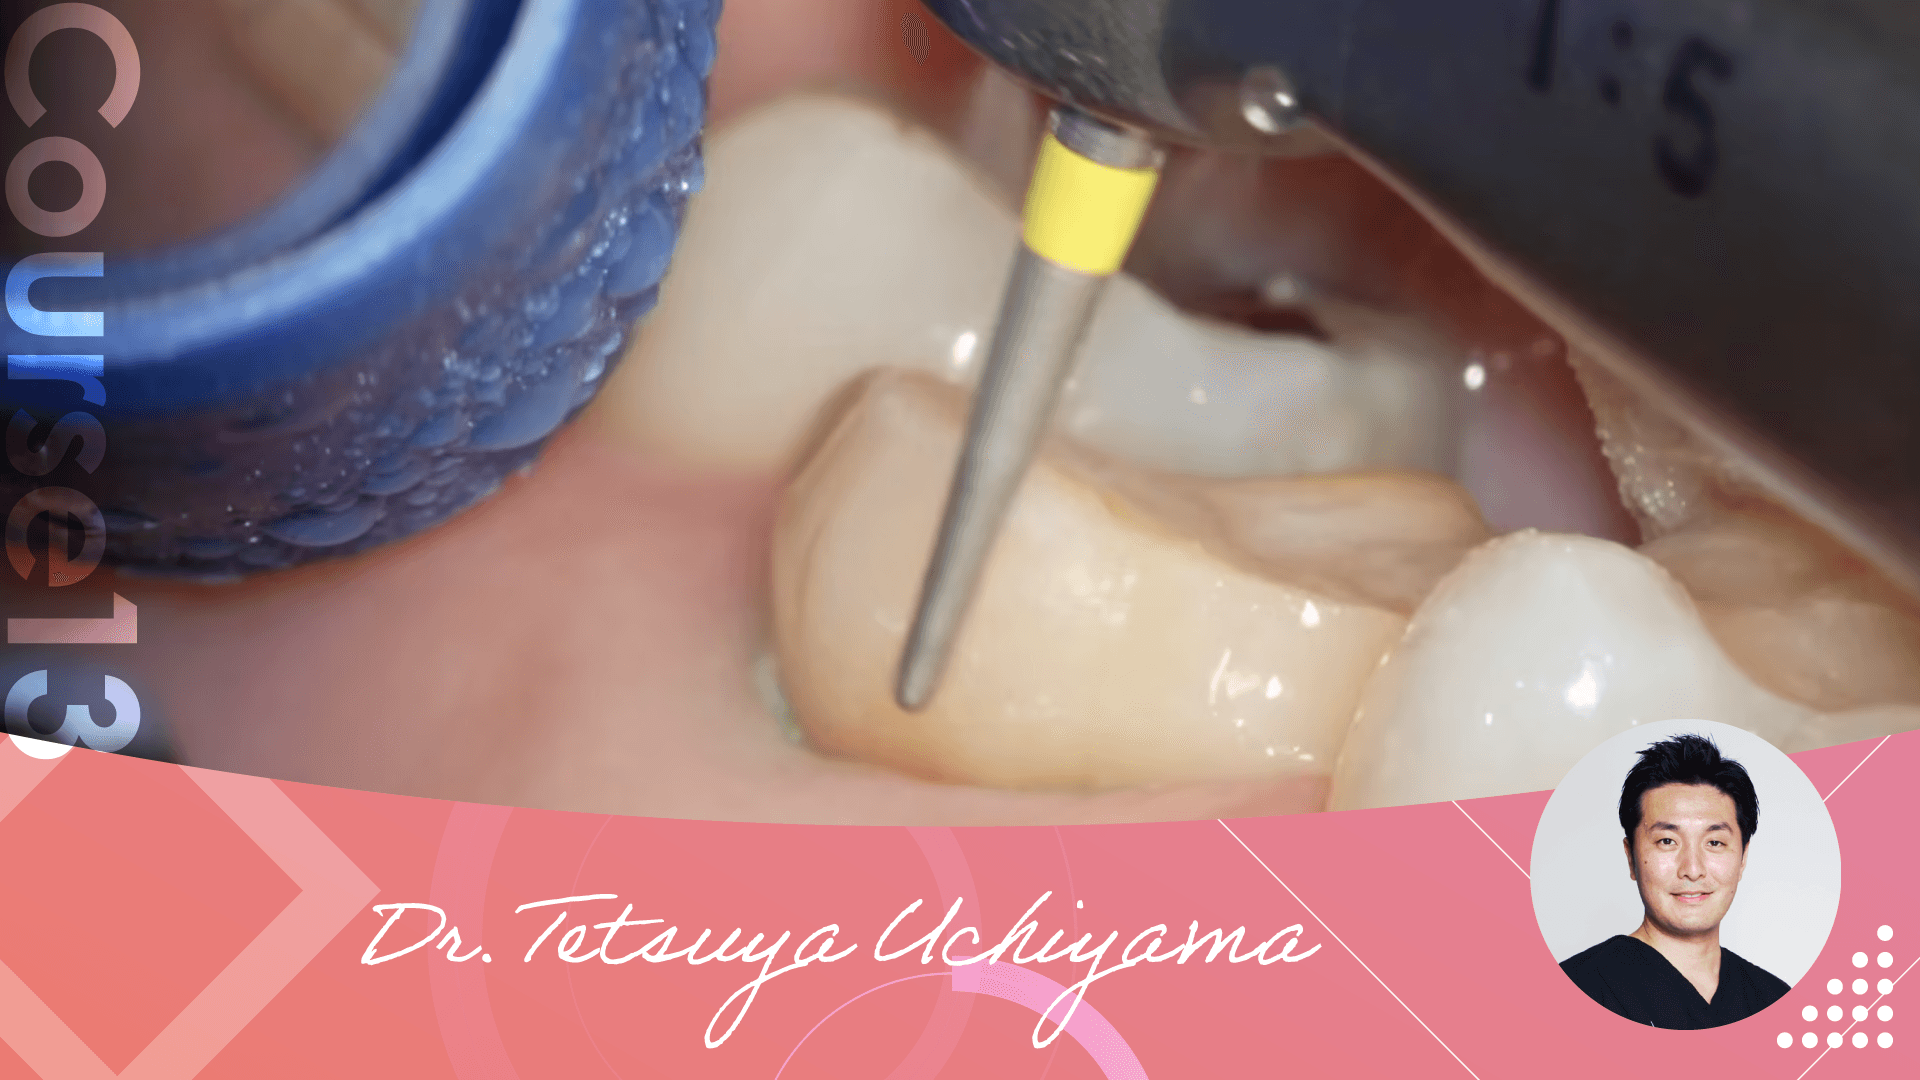 Dr. Uchiyama Course 13Sloped Occlusal Veneer (All Videos)
This video includes all of the following videos from Course13 SVO - Sloped Occlusal Veneer.
[#1 Tabletop design concept based on actual cases]
In the #1 video, you first explained the concept of table top veneers based on the CAP concept we have been explaining. After that, he explains the process of treating an inlay with secondary caries with table top veneers based on the video taken with a microscope. The video explanation makes it easy to understand the points that need attention.
[#2 CAP from final formation to provisional set]
Video #2 is a continuation of #1. The concepts of material selection and formation with table top veneers were explained based on the literature. The treatment video then continues. He explained the concept of the abutment formation while practicing the concepts explained, and even explained the key points of provisional fabrication with table top veneers.
[#3 Completion Treatment. About shades and cement and set]
The #3 video mainly explains adhesion. First, the internal surface treatment of ceramics is explained with video. In this case, we used Flow composite resin for setting, and explained its superiority over regular cement using the literature. The clinical use of the composite resin is also explained, and the actual bonding process is illustrated in the video under the microscope.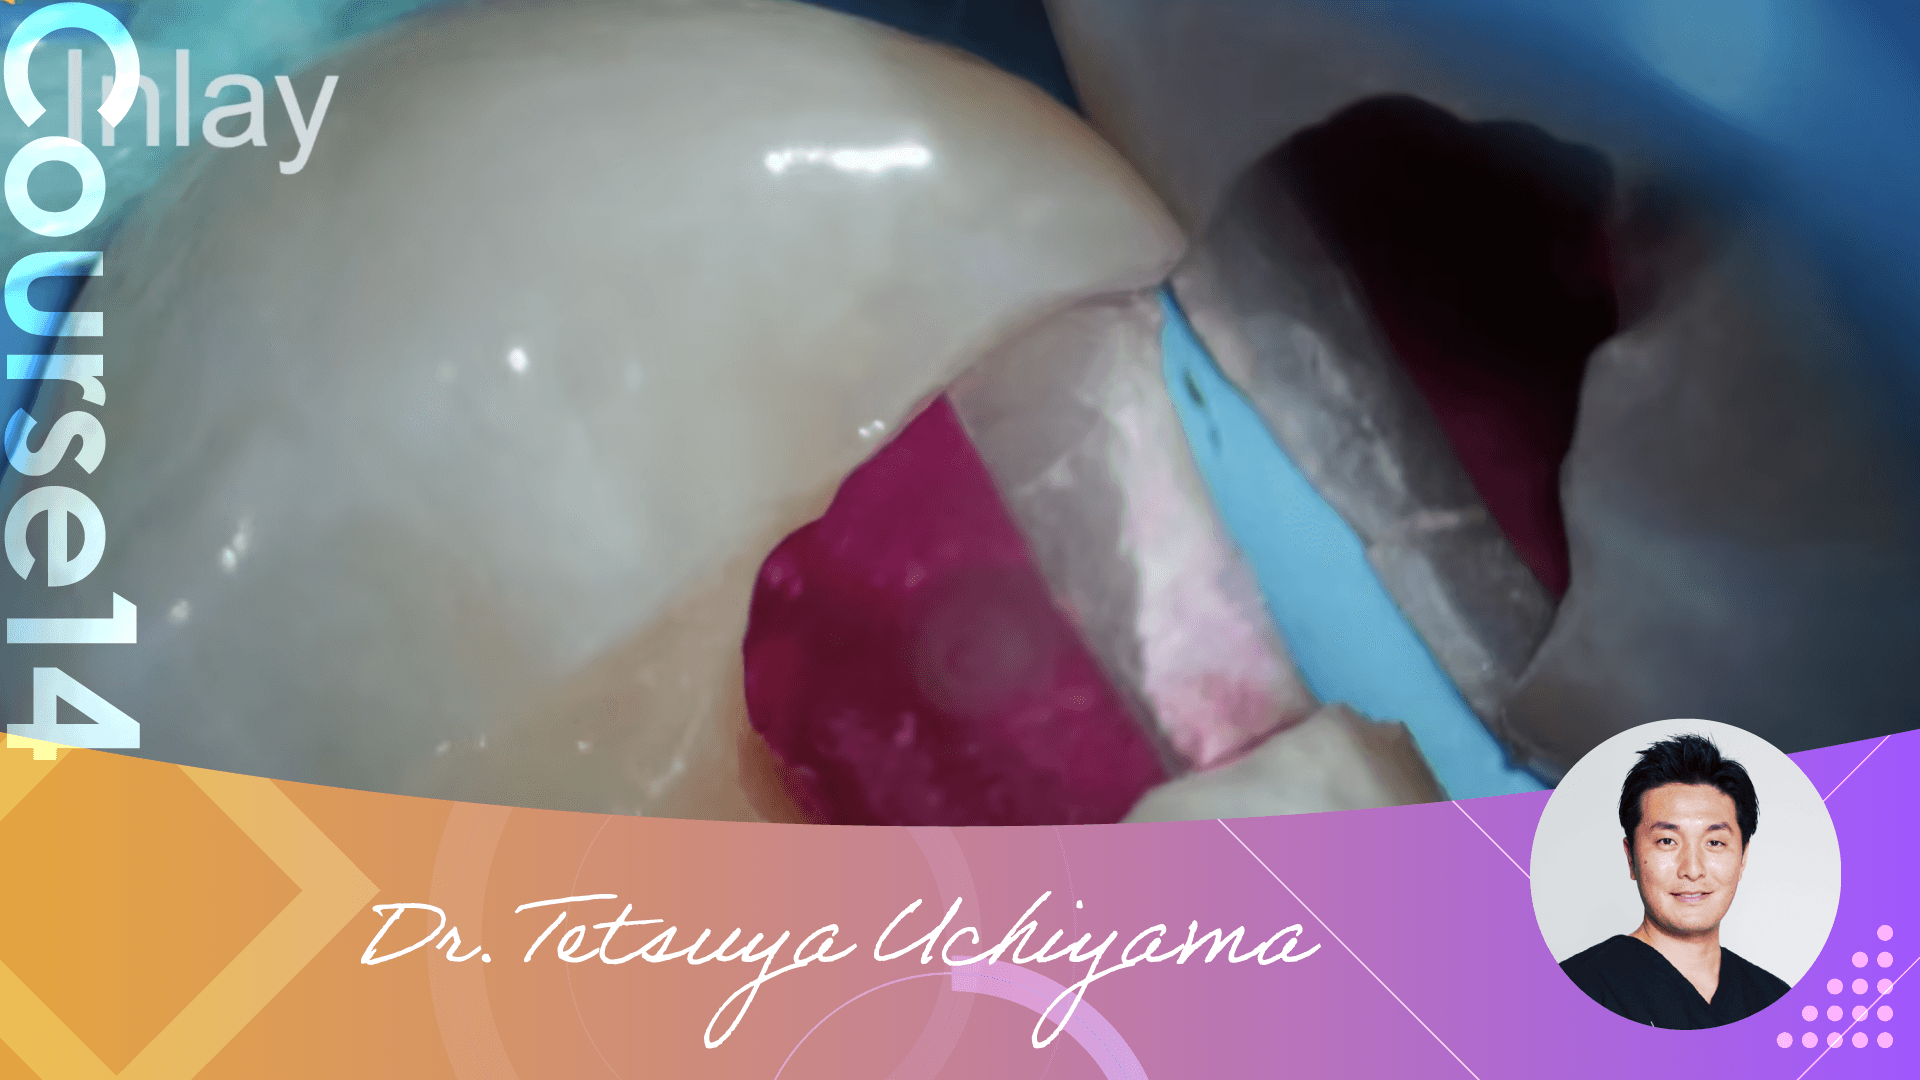 Dr. Uchiyama Course 14Inlay (All Videos)
This video includes all of the following videos from Course14 Inlay.
[#1 About Inlay Treatment]
In the #1 video, he explained inlay treatment, including material selection, treatment of free enamel at the time of formation, and the necessity of rubber dam dam dampening, based on literature and past cases. The video then explains the key points from caries treatment, formation, impression, bonding, setting, and occlusal adjustment using a video under the microscope.
[#2 What is sloped Inlay?]
The #2 video explains the sloped inlay applying the table top veneer concept. The entire process from rubber dam-proofing, caries removal, setting, and occlusal adjustment was explained in the video under the microscope.
[#3 Treatment concept for subgingival caries]
In video #3, he explained how to manage subgingival caries, which is often difficult to deal with when encountered in clinical practice.
He introduced various techniques on how to use a rubber dam to prevent moisture in cases with subgingival caries.
The following is a brief explanation of the techniques and gingival restoration that are necessary for crown lengthening.
[#4 Summary and course preview]
In video #4, he explained the results of the subgingival margin caries procedure described in video #3 with x-rays. After that, he talked about the anterior tooth CAP concept and molar CAP concept in summary.
At the end, Dr. Uchiyama showed us a video introducing the Micro generalist hands on cource for beginners, which will be expanded from next year.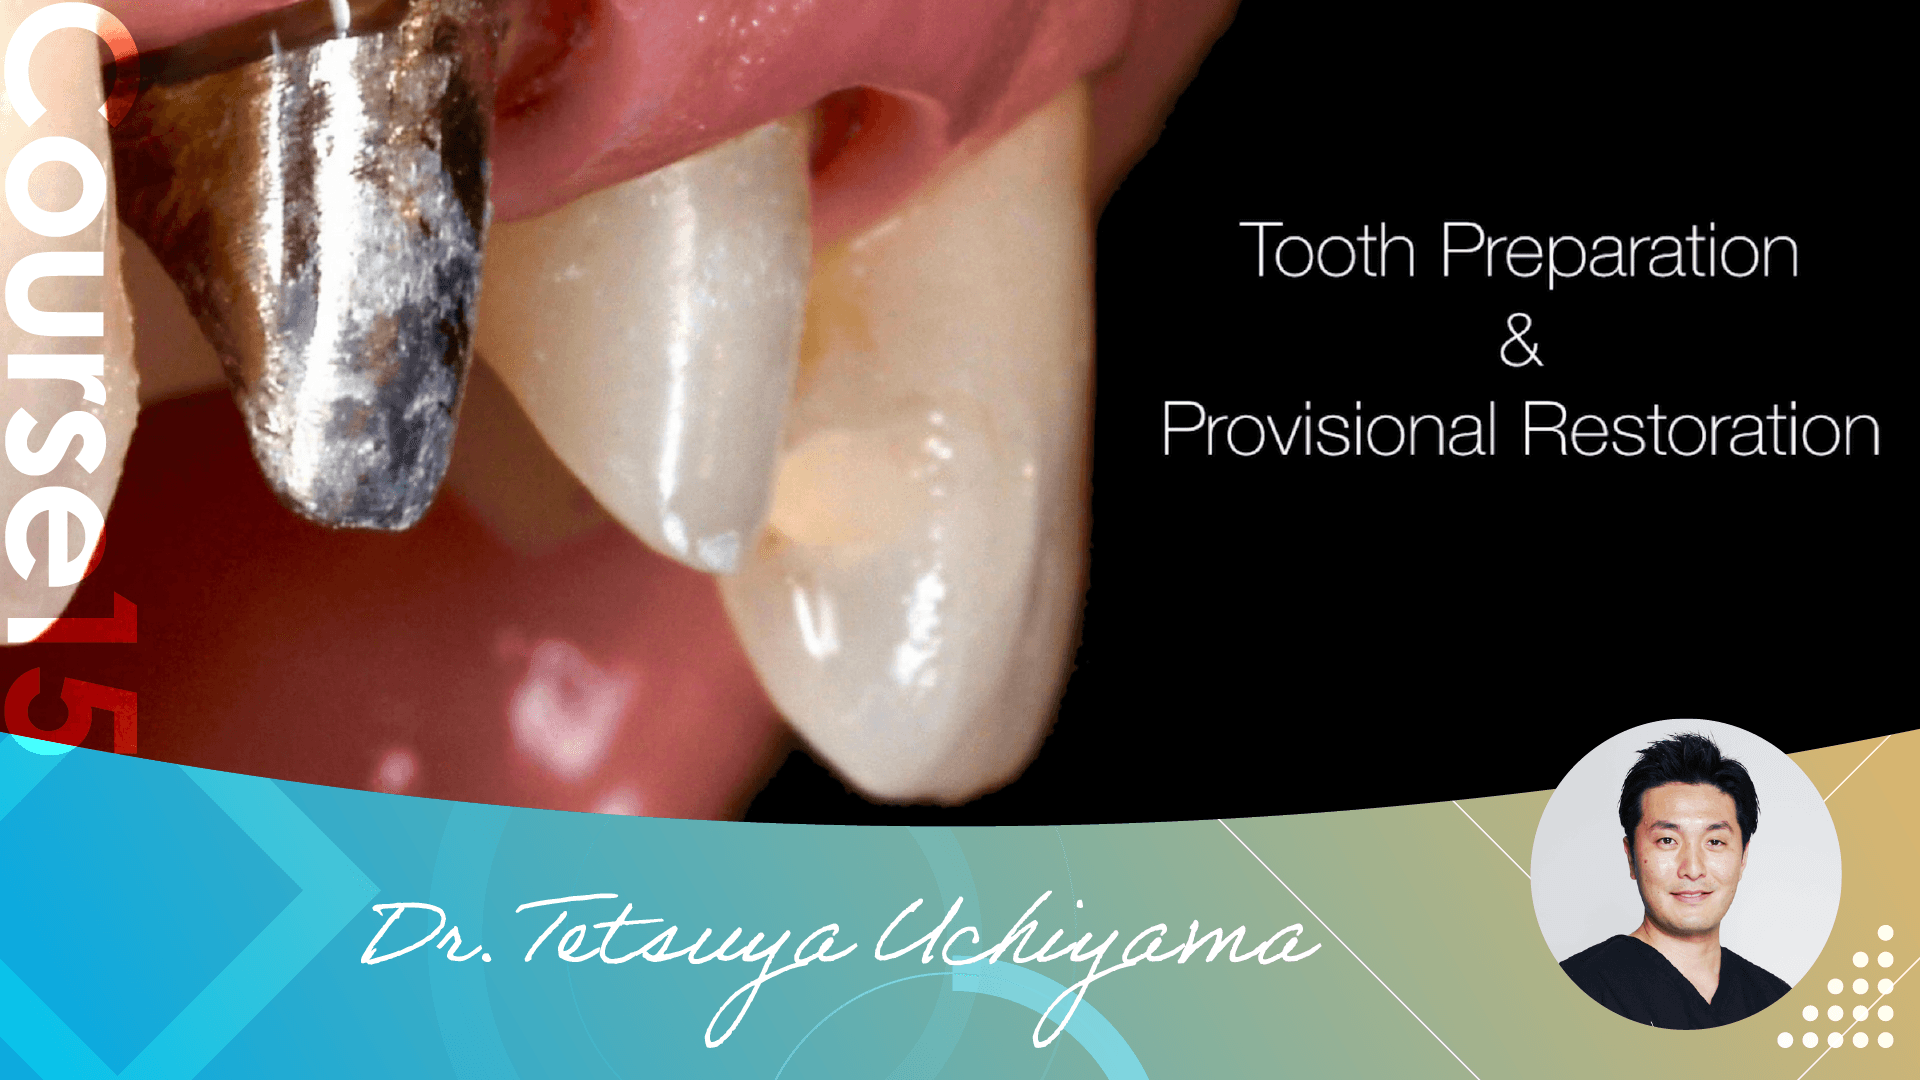 Dr. Uchiyama Course 15Basic provisional restoration (All Videos)
This video includes all of the following videos from Course15 Basic provisional restoration.
[#1 Tooth Preparation Requirements]
What are the requirements for abutment formation as a pre-prosthetic procedure?
It is not just a matter of cutting, but the requirements depend on the final material to be used.
Formation is also related to the maintenance of the provisional restoration.
This session will be discussed in detail using actual cases, photos, and videos.
[#2 Various pre-prosthetic treatments]
Esthetics is not the only requirement for a provisional restoration.
It is important how to reproduce the condition of the oral cavity and to be aware of the final restoration, and furthermore, how to reflect the record of the provisional restoration in the final restoration.
He also discusses internal bleaching and gum peeling as pre-prosthetic procedures.
[#3 Dealing with problems]
Provisional restorations also serve as a communication tool for discussion and exchange of ideas with the technician and patient in determining the form of the final restoration.
Inappropriate provisional restorations can cause inflammation of periodontal tissues, whereas appropriate restorations can help manage the soft tissues.
Please take a look at Dr. Uchiyama's innovations.
[#4 Role of the provisioner]
In the first half of the presentation, he explains a video showing the revision of a provisional restoration, allowing the viewer to confirm the change in gingival inflammation after the revision.
He also explains the difference between temporary crowns and provisional restorations, and explains in detail the various roles that provisional restorations play, along with case photos.
[#5 Application to orthodontics]
Provisional restorations are often applied in orthodontic treatment.
The lecture presents a case study in conjunction with orthodontic treatment and discusses in detail the series of steps from the completion of orthodontic treatment to the final restoration.
In the latter half of the lecture, he explains each point of the abutment tooth formation considering gingival homeostasis, from gingival anatomy to actual treatment videos.
[#6 Tissue Management]
Continuing from #5, the article explains in detail, with key points, each step up to the setting of the provisional restorations after the formation that takes gingival homeostasis into consideration.
The number of treatment sessions until the final impression is also affected by how much pre-treatment is done at the initial visit.
The patient's gingival as well as abutment tooth coloration has been changed by not only setting the provisional restorations but also performing the internal bleaching at the same time.
[#7 Points of impression taking]
This case is a continuation of #6 and shows the series of steps from gingival indentation after final formation and impression taking to the final prosthesis.
He explains the method of gingival indentation and the detailed tips for impression taking, which is important for the creation of the prosthetic.
In addition, there are cases where there are no crowns in the original prosthetic treatment.
In such cases, he explains what should be kept in mind and the reason why the Initial Prep and Final Prep are done separately.
[#8 Setting up an emergence profile]
In the first half of the video, he explains how to reflect the canine guidance set in the provisional restoration in the final restoration, following #7.
The second half of the video focuses on molar restorations and explains in detail how to set the emergence profile, which tends to be lost during the wash process.
[#9 Impression taking from Final Preparation]
This is a continuation of the case #8 in which Initial Preparation was performed. After removal of the provisional restoration, Final Preparation is performed, impressions are taken, and the provisional restoration is readjusted.
The difference between the Initial and Final preparation, gingival indentation, and each step of impression taking are explained in detail.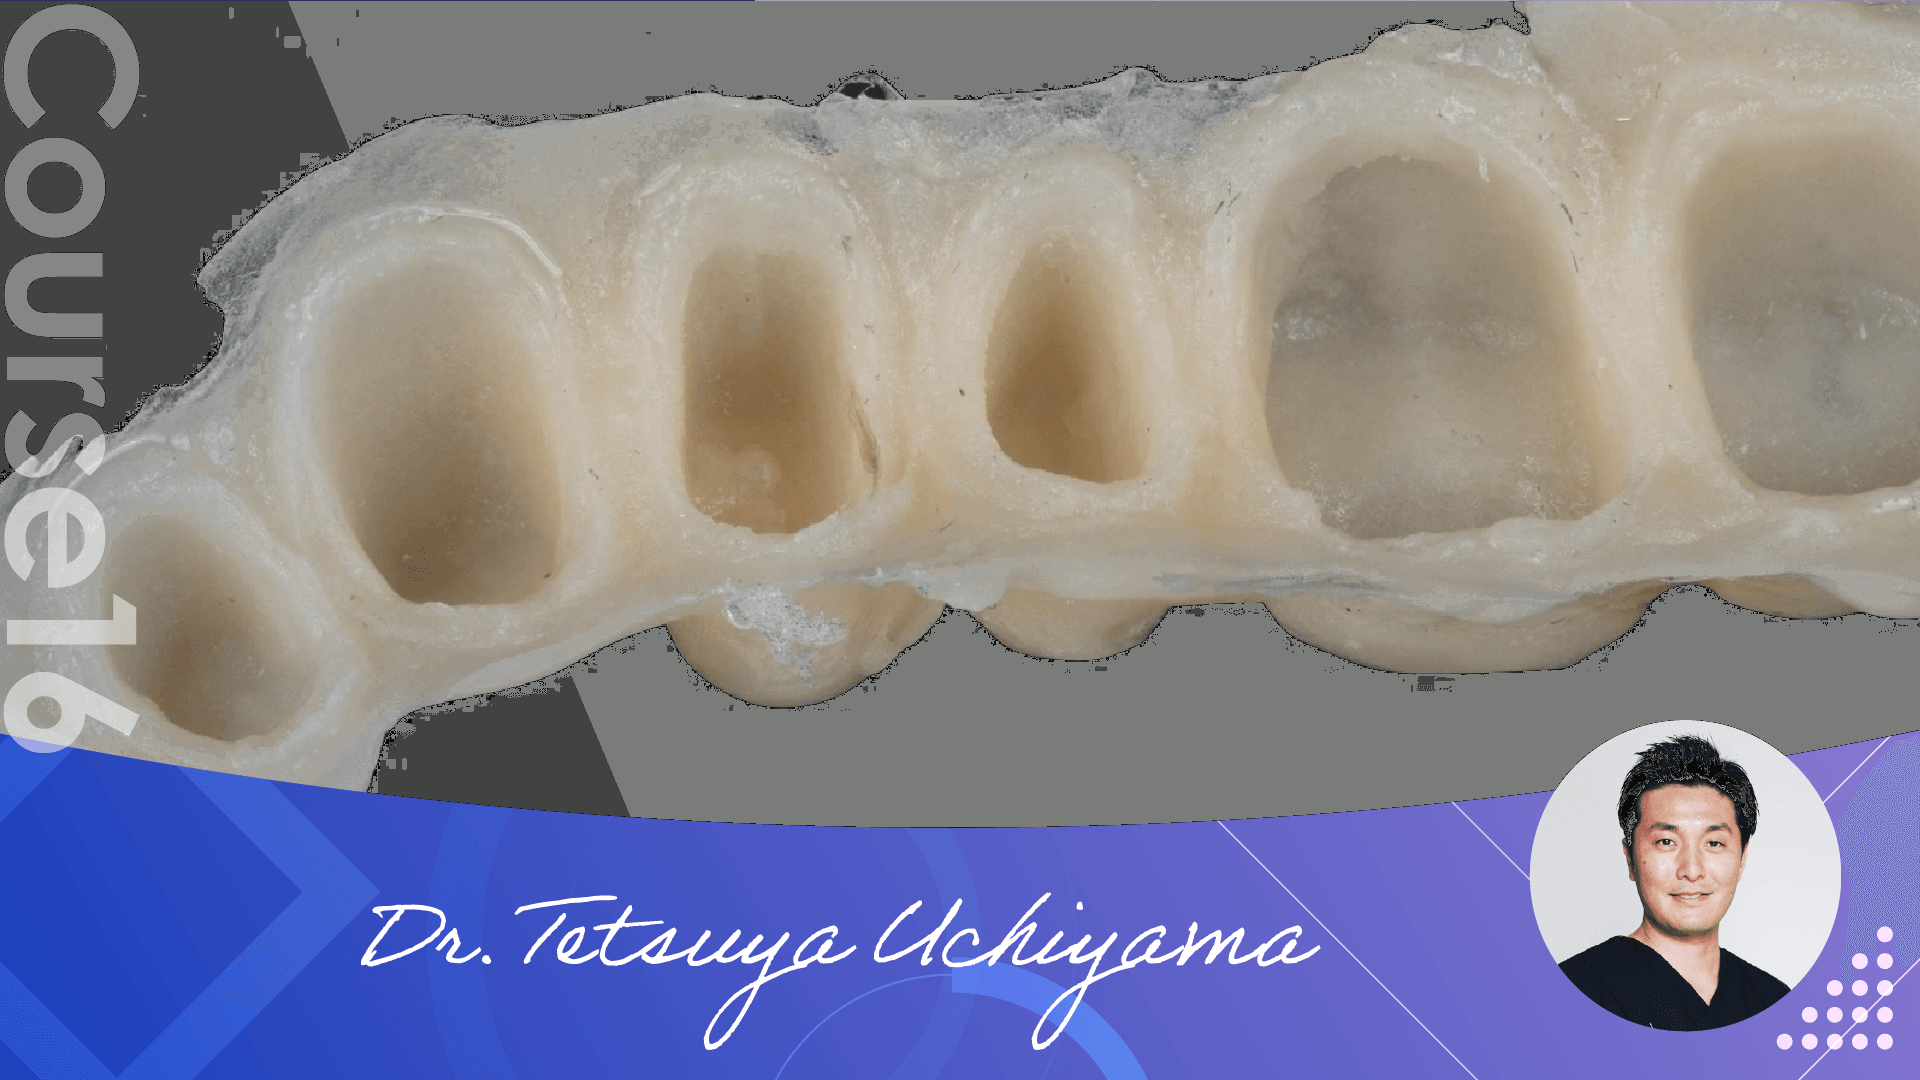 Dr. Uchiyama Course 16Advanced provisional restoration(All Videos)
This video includes all of the following videos from Course16 Advanced provisional restoration.
[#1 Material Selection]
Even if you have placed what you consider to be an ideal provisional restoration, it is often dislodged or cracked repeatedly due to strong occlusal forces.
In #1, you can see the material selection and adjustment of the actual four-tooth provisional restorations.
[#2 Provisional Restorations in Digital]
Continuing from #1, the first half of this article discusses resin materials.
It explains what materials are used in cases of acid erosion and excessive occlusal forces.
The fabrication of digital-based provisional restorations is also touched upon.
The second half of the presentation focuses on cases in which the bite has been compromised by prosthetic materials.
He discusses how to diagnose the occlusion and how to simulate the ideal CR position with a wax-up on a model.
[#3 CR position]
Finally, it's time for provisional restorations in upper and lower multiple tooth defects.
The preoperative diagnosis - removal - formation - provisional restoration is introduced in detail.
He also explains in detail the fabrication of provisional restorations in the CR position using a wax-up model.
You will also learn the ability to think about how to clear problams one by one even in more difficult cases. Please take a look.
[#4 Cross byte procedure]
CR position and ICP are not always the same and do not always work well, which I think is one of the main reasons why provisional restoration of multiple teeth is so difficult.
Therefore, Dr. Uchiyama performed the CrossBite procedure in the CR position and performed provisional restorations again in the case mentioned in #3.
It is difficult to get an image from the text, but he explains it in an easy-to-understand manner in the video. Please take a look.
[#5 Importance of Occlusion and Tissue Management]
Finally, the final wash, impression and final. This is the final step from #3.
This is a great reminder of the importance of proper occlusion and tissue management.
Although at first glance provisional restorations may not look like much, you will learn how essential they are for prosthetic treatment that combines both esthetic and functional aspects. Dr. Uchiyama Course 17Zirconia framework(All Videos)
This video includes all of the following videos from Course17 Zirconia framework.
[#1 Shade Taking]
In Part 1, we focused on Shade Taking, which is a major weight in achieving aesthetic desires.
When looking at the shades, do you find that they differ depending on the lightness or darkness in the mouth, or do you find it difficult to understand them after looking at them many times? Dr. Uchiyama has found a way to check Shade in detail on a PC. You will see how to choose a camera for Shade Taking, which is very important for making a judgment, and how to do Shade Taking efficiently.
[#2 Material]
In Part 2, we will discuss restorations for minority teeth.
What is the material of choice for minority restorations? With the evolution of materials, more and more cases can be completed in the spirit of MI. The amount of cutting that we learned in school may be out of date. This lecture explains the process from material selection to actual restoration of molar Table top Veneer (Onlay) and anterior restoration.
[#3 Indications for Zirconia Crown]
Zirconia has been developing at a dizzying pace over the past few years.
Part 3 is a major case study in which zirconia frames are used when occlusal reconstruction is required, as opposed to the minority tooth prosthetics that have been used in the past.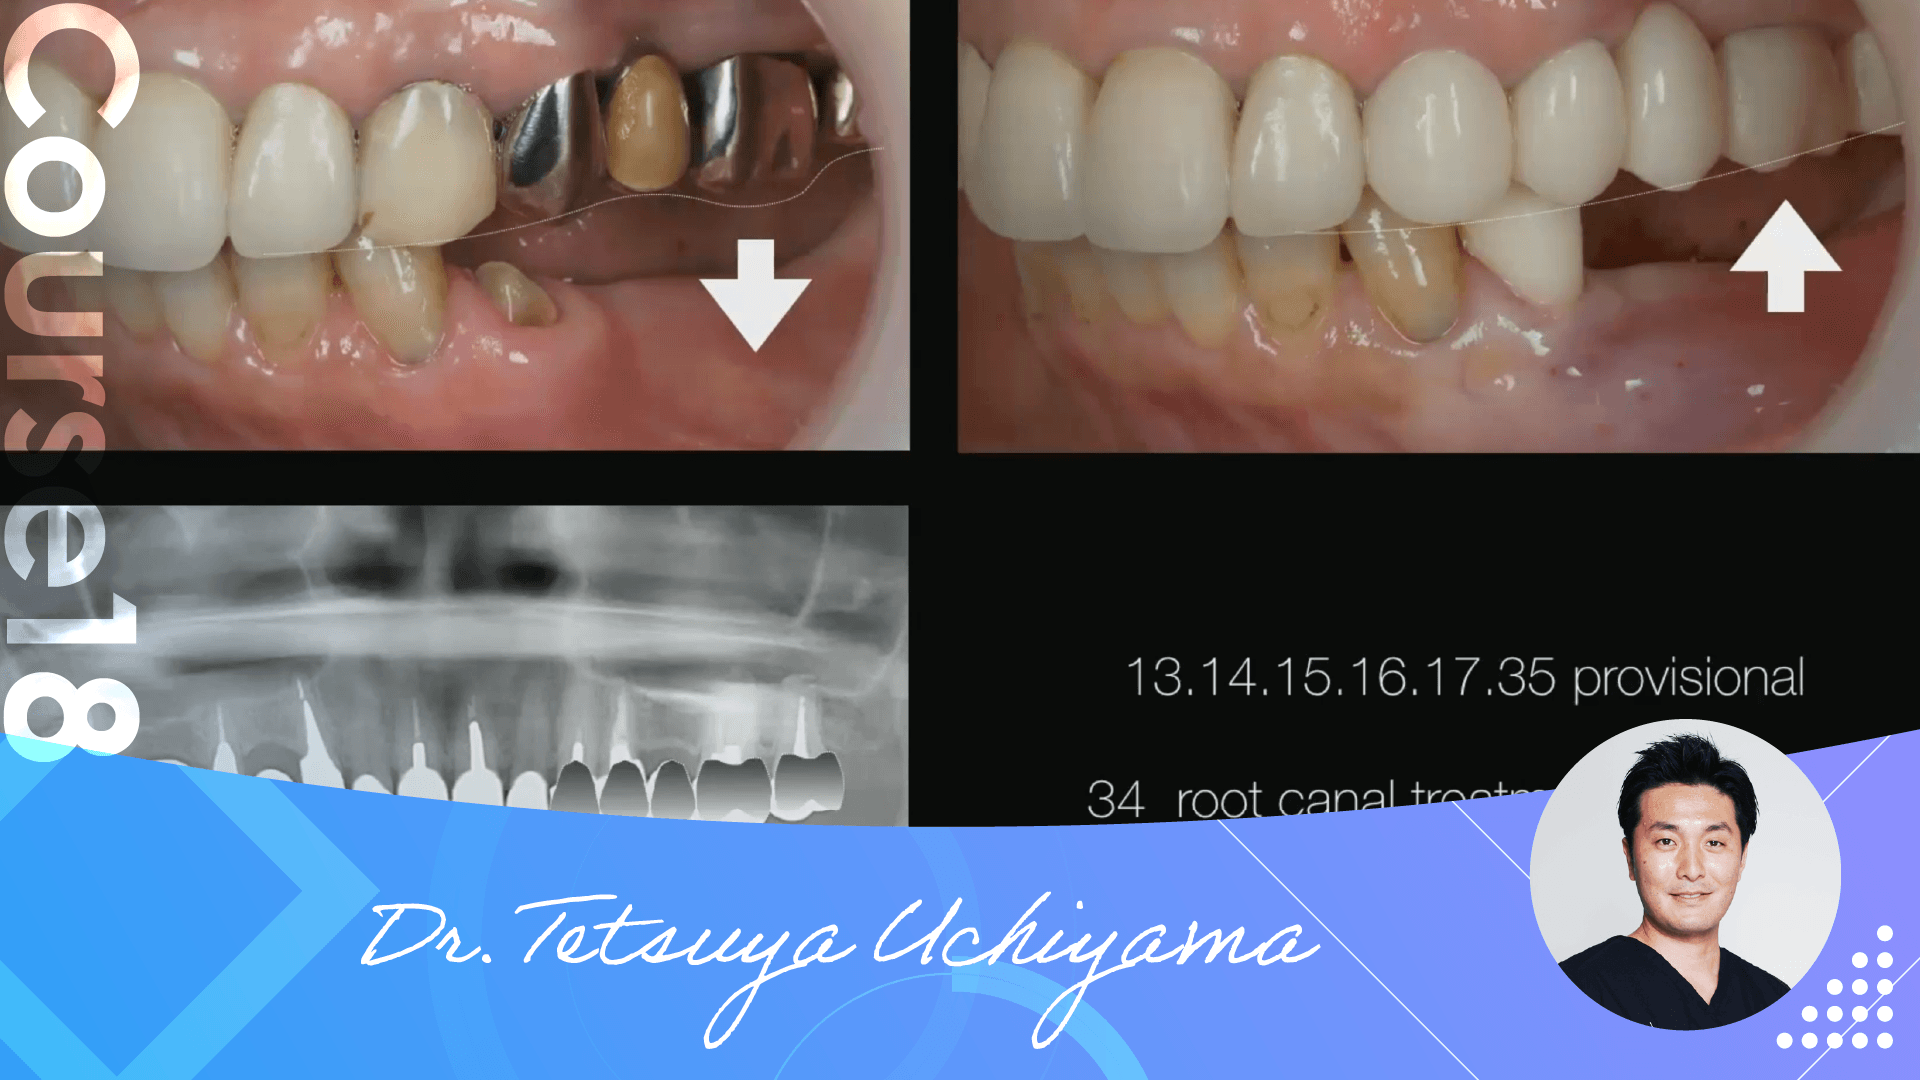 Dr. Uchiyama Course 18Maxillofacial Analysis 1(All Videos)
This video includes all of the following videos from Course18 Maxillofacial Analysis 1.
[#1 Diagnosis and consultation]
This presentation is about treatment with a maxillofacial focus.
How do you approach patients who do not maintain their occlusion for various reasons?
This presentation shows how to determine the occlusal height based on maxillofacial information using cephaloanalysis and other methods, and how to determine the prognosis.
This is a full-maxillary treatment for a patient who had difficulty in chewing after a full-maxillary prosthesis 10 years ago.
In #1, we mainly deal with material collection and diagnostic examination. Cephaloanalysis and its results can be viewed.
[#2 Provisional Restoration Fabrication]
This presentation is about maxillofacial treatment.
In #2, you will see the results obtained in #1, wax-up, fabrication of the provisional restorations, and the final set after various processes.
You can learn about the dentist's attitude toward the patient, which is to thoroughly examine and diagnose the patient through careful reevaluation.
Please take a look.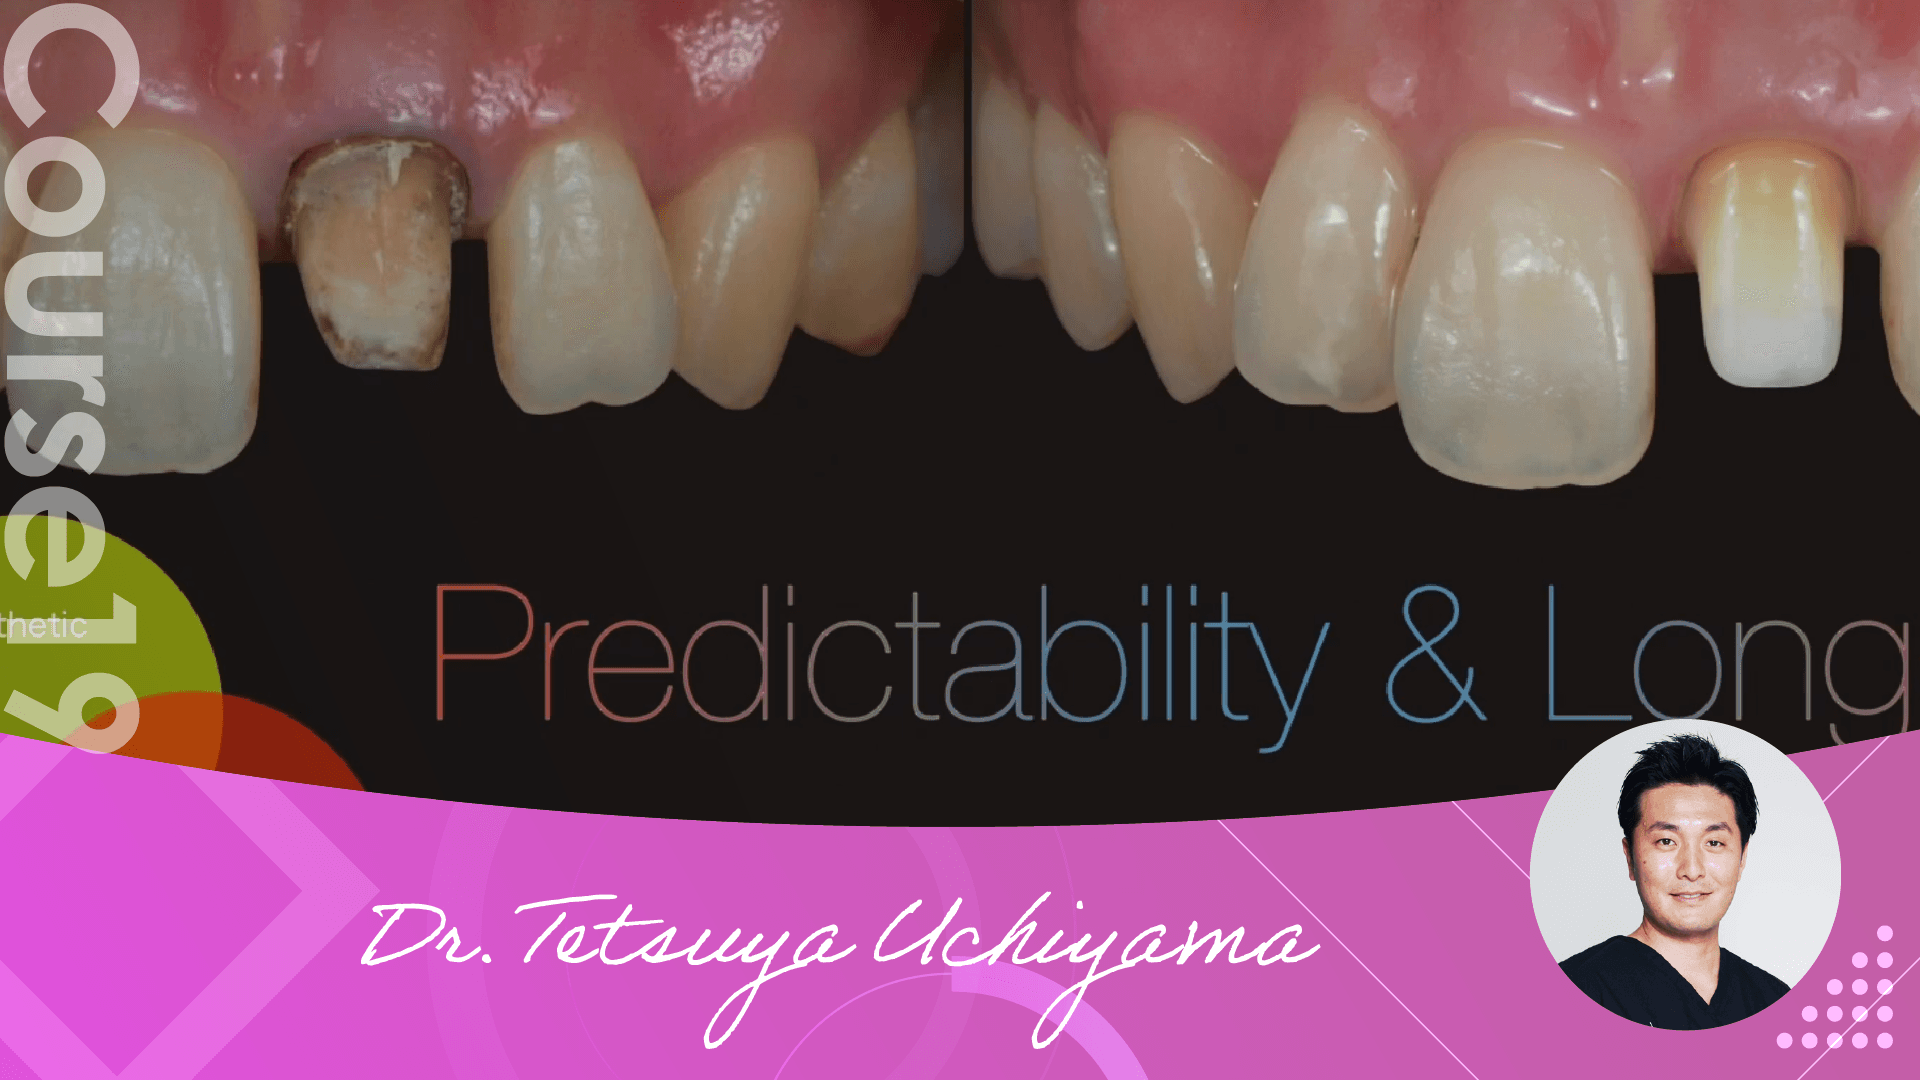 Dr. Uchiyama Course 19Maxillofacial Analysis 2(All Videos)
This video includes all of the following videos from Course19 Maxillofacial Analysis 2.
[#1 Occlusal reconstruction]
What is a comprehensive treatment plan that takes into account predictability and longevity, rather than just the tooth itself?
In actual clinical practice, most doctors may not have enough time for their patients or have a limited budget.
For example
If a patient says, "Please give me what you think is the best treatment.
What kind of treatment plan would you make if your patient asked you to do what you think is the best treatment?
In this issue
In #1, we discuss what to pay attention to in such a situation.
[#2 Preoperative checkpoints in the aesthetic field]
In #2, he explains veneer restorations for dwarf teeth.
Veneer restoration is a field where there are many concerns about the actual clinical practice because there are various ways of thinking about the margin, the amount of formation, the fabrication of the probing and the temporary attachment, and so on.
Please take a look at Dr. Uchiyama's beautiful fabrication and formation of probes.
[#3 Prep guide]
In Part 3, we will look at provisional restorations for veneer restorations.
In veneer restoration, it is essential to collaborate with an excellent technician, and he carefully explains the points to keep in mind.
The clinical video shows the actual method of provisional restorations and temporary restorations under a micro field of view.
[#4 Adhesion of veneer restoration]
This is the Final set of veneer restorations.
You can learn how to use the rubber dam to prevent moisture and what to keep in mind. And here is a case of an anterior maxillary tooth with surface irregularity and median deviation.
How should we approach this case?
[#5 Case Anterior Guidance granted]
This is the Finalset of the case mentioned in #4.
In Dr. Uchiyama's presentation, we touched upon the comprehensive dentistry realized by Dr. Uchiyama and his Specialists, and I am sure that you have felt the importance of this practice every time you have seen it.
So, why is anterior guidance important again? Please refer to the following page for a detailed explanation.
[#6 SpO2 Pulse and occlusion]
As mentioned in #5, anterior guidance is important, but whether or not active intervention should be performed is critical.
In #6, you will see cases that were solved by occlusal appliance without intervention and cases that were solved by intervention.
What is comprehensive dentistry in practice?
What is the occlusal reconstruction for each patient?
This presentation will give you hints to solve such questions.
[#7 Proximal and distal distances of implants]
This is mandibular anterior implant placement in the case mentioned in #6.
The mandibular anterior region is considered the most difficult to place with barely enough proximal and centrifugal space.
You can take a closer look at it including the impression method.
Through the case study, he emphasizes the importance of Maxillo Facial Analysis in providing anterior guidance and beyond that.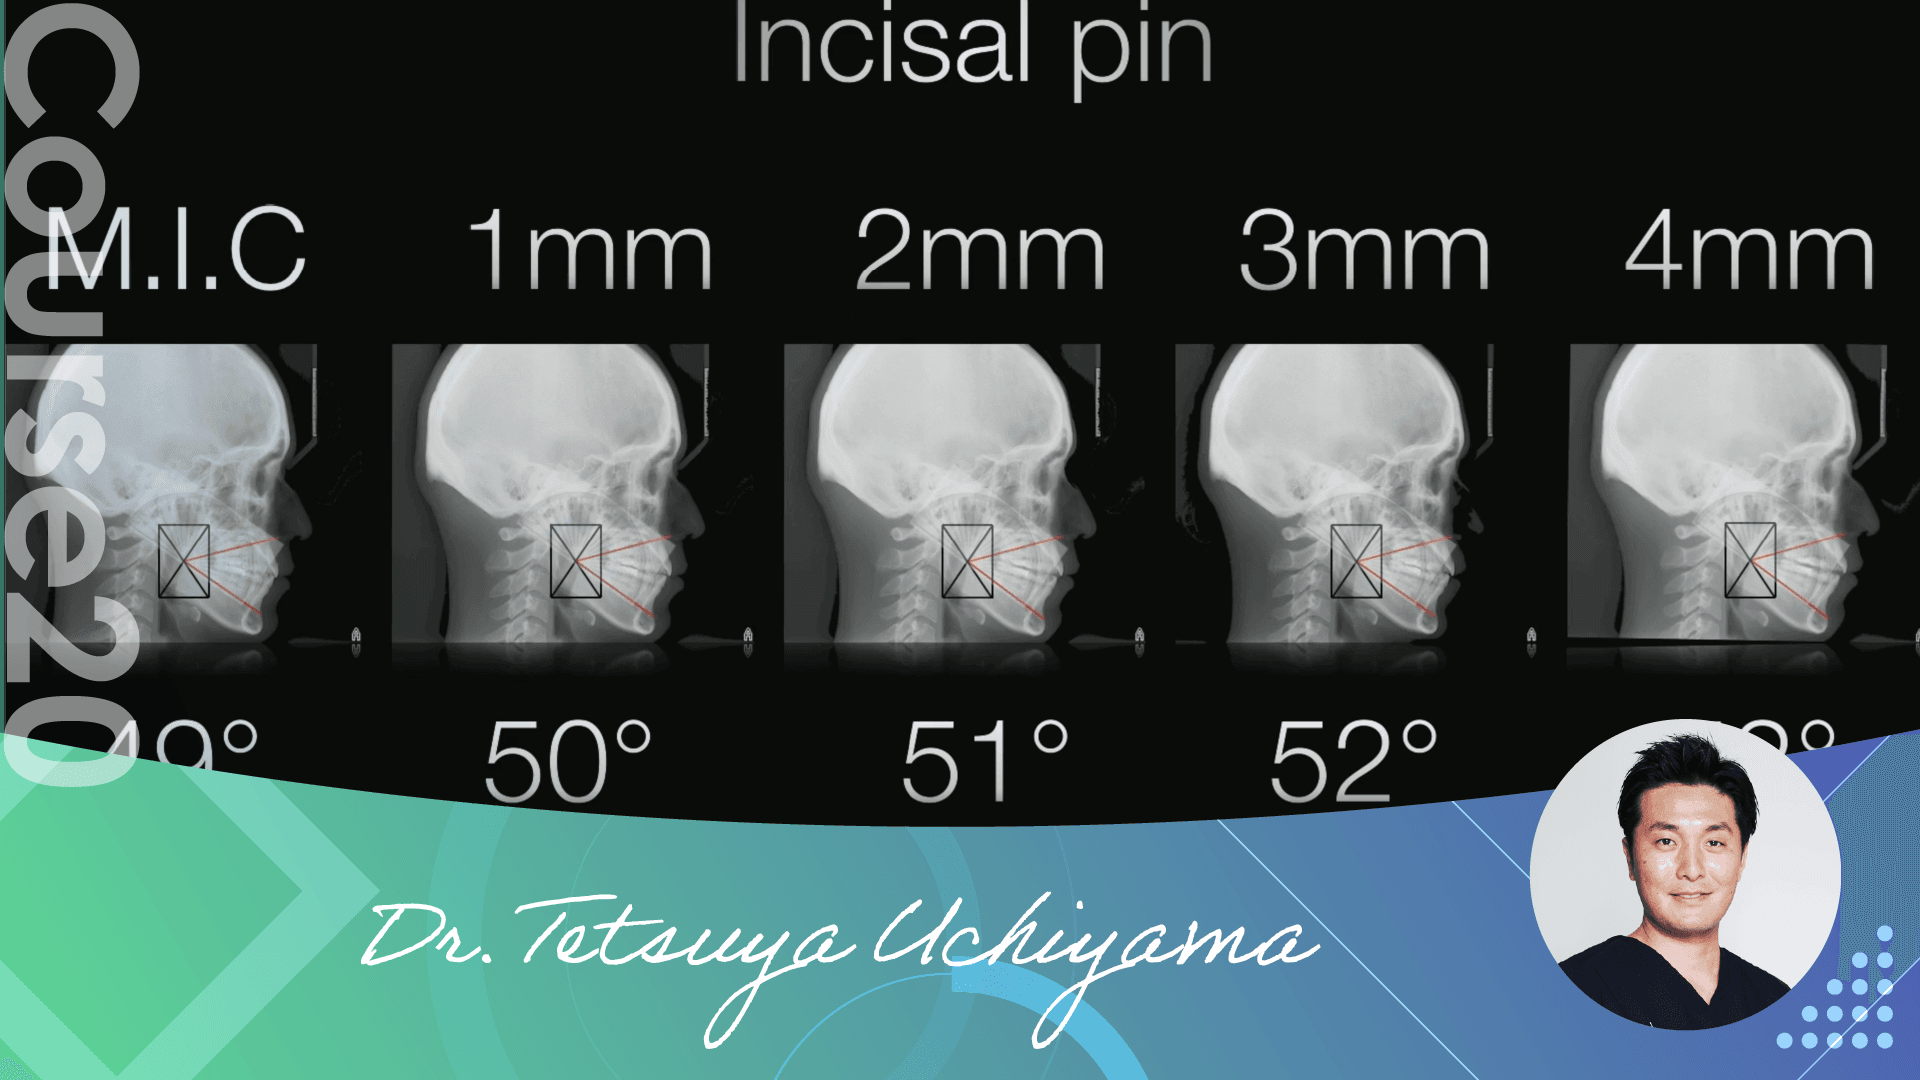 Dr. Uchiyama Course 20Maxillofacial Analysis 3(All Videos)
This video includes all of the following videos from Course20 Maxillofacial Analysis 3.
[#1 To develop a comprehensive treatment plan]
In clinical practice, we are sometimes faced with situations where we have to treat the entire jaw.
What is the process of comprehensive treatment and what should be taken into consideration when planning a treatment plan?
He explained in detail with various workflows and data.
[#2 Team Approach]
Continued from #1, this is a case that Dr. Uchiyama has been working on from the time when he was a young doctor to the present.
He explained the steps from initial treatment to reevaluation and final prosthetic treatment. He also talked about the necessity of a team approach when re-treatment becomes necessary.
The importance of the team approach is also explained in the latter half of the case.
[#3 Importance of diagnostic wax-up]
Diagnostic wax-ups are indispensable for comprehensive treatment planning because they serve as indicators of treatment goals.
He discussed its importance with actual cases.
In the latter half of the lecture, Dr. Uchiyama explained a case in which he himself created a provisional restoration and a surgical guide from a wax-up when he was a young dentist.
[#4 Diagnostic wax-up notes]
In order to create a diagnostic wax-up, there are many things to consider in order to restore occlusion, not simply esthetic requirements.
Continuing from the second half of #3, he explained in detail the points to keep in mind and actual cases in which wax-ups were used.
[#5 What led me to consider Maxillo Facial Analysis?]
Dr. Uchiyama explained the case that led him to consider Maxillo Facial Analysis, which is currently advocated and practiced by Dr. Uchiyama.
There were several points to be considered in determining the height of the occlusion, and one encounter led to a change in the order of priority.
In the latter half of the presentation, he explained a case in which Maxilla Facial Analysis was actually applied.
[#6 Maxillo Facial Analysis in Practice]
Continuing from the second half of #5, he explained the transition from placement of provisional restorations to final restorations using the Skip Method after determining each step.
In the latter half of the presentation, he explained the classification of prosthetic treatment based on Maxilla Facial Analysis and the cases that fall under each class.
[#7 Classification of Prosthetic Treatment by Maxillo Facial Analysis]
Continuing from #6, we have a commentary on the cases that fall under each Class of the classification of prosthetic treatment by Maxillo Facial Analysis.
In the first half of the presentation, the Class 2 cases are introduced to explain the differences in the points to be considered in each division.
In the second half, he introduced Class 3 cases that require significant improvement.
[#8 Cases requiring significant improvement]
Continuing from the second half of #7, we have received an explanation of Class 3 cases that require significant improvement.
Unlike Class 2, various diagnoses and decisions such as changes in facial appearance, occlusal height diameter, and occlusal plane are required.
The lecture explained the key points of each step, including the final prosthesis and post-operative course, with Dr. Uchiyama's discussion.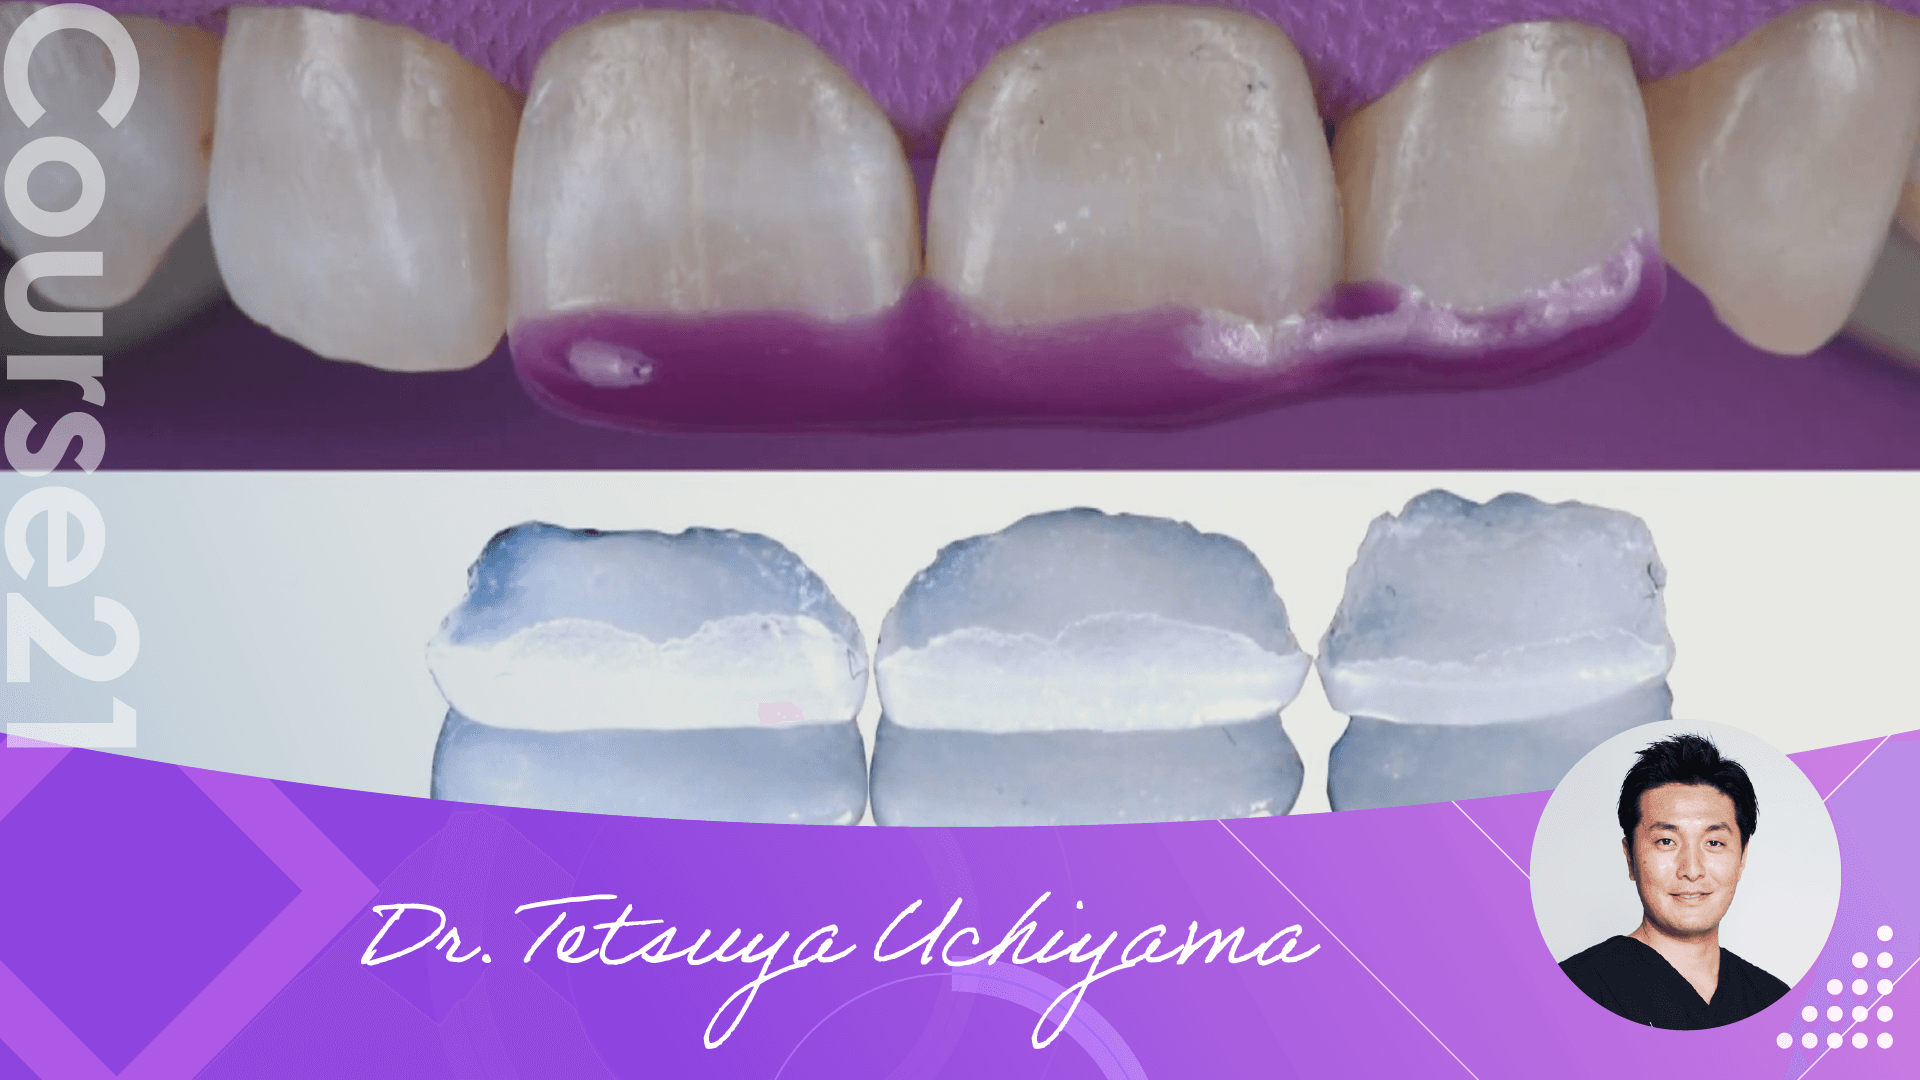 Dr. Uchiyama Course 21Maxillofacial Analysis 4(All Videos)
This video includes all of the following videos from Course21 Maxillofacial Analysis 4.
[#1 Vertical Diagnosis in Craniofacial]
In this 16th and final installment, we present a case of a comprehensive approach using Maxillo Facial Analysis.
The case study begins with a Maxillo Facial Analysis, which can be performed in less than 5 minutes using a PC.
[#2 How to Wax up]
Do you have the image that you do not want to touch the incisal area of highly occlusal worn mandibular anterior teeth because it will soon become dehiscent?
In this case, there was no dehiscence at the time of provisional restoration. This is the result of the correct jaw position diagnosed by cephalometric analysis, which enabled MI and comprehensive treatment.
Please take a look at the following pictures.
[#3 Maxillary final restoration set]
He explained the cases discussed in #2 up to the maxillary final set.
The lecture also reviewed the position of the zirconia frame in the Grade 3 case and cementation in the veneer restoration.
[#4 Case of occlusal collapse of molars]
The occlusal plane is flattened due to the occlusal collapse of the molars, the mandible is anteriorly positioned, the articular disk is anteriorly positioned, and it is difficult to secure the airway.
This presentation will show the analysis and Trial Therapy of a case in which the occlusion and jaw position had to be changed.
[#5 Occlusal reconstruction × minimally invasive]
He explained the final set of cases discussed in #4.
No matter how difficult the case is, "occlusal reconstruction x MI" is realized instead of "changing occlusion and jaw position = full prosthodontics".
22 hours of lectures, 16 sessions in all, "A generalist training course for the next generation of dentists.
What did you think of Dr. Uchiyama's presentation, in which he has faith and pays attention to every detail?
I am sure that each and every one of you who have watched all the contents have felt something different.
We also received a message from Dr. Uchiyama to the young doctors, so please watch the lecture until the end.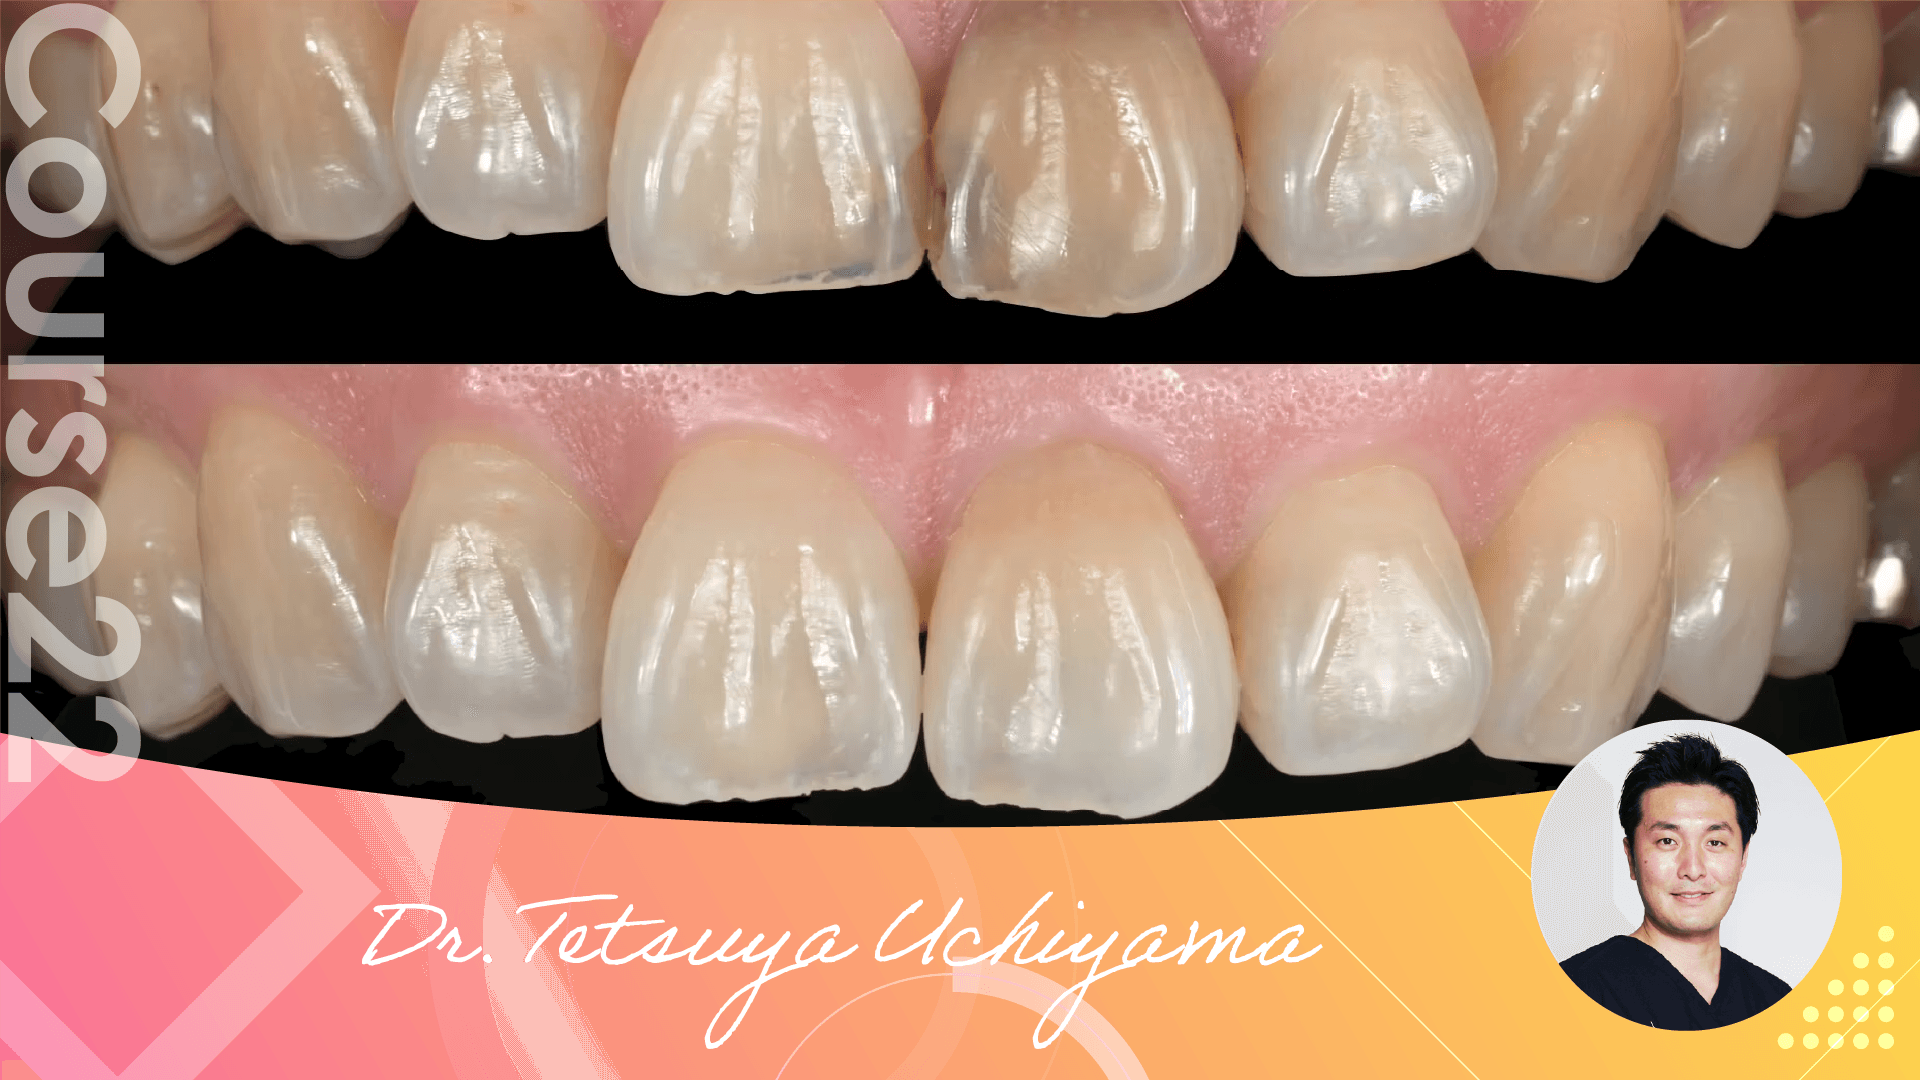 Dr. Uchiyama Course 22BASIC Bonded Restoration -Revised Edition-(All Video)
This video includes all of the following videos from Course22 BASIC Bonded Restoration -Revised Edition-.
[Course22 BASIC Bonded Restoration -Revised Edition-]
Composite resin restorations are an effective tool for gaining the trust of patients when successful, as it is a treatment that is performed almost every day in daily clinical practice and is a cosmetic dental procedure that can be performed chairside by the dentist without the help of technicians.
Adhesive treatment in dentistry, including composite resin, has evolved remarkably over the past few years with the introduction of many new materials and technologies.
Composite resin restorations performed by Dr. Uchiyama have also undergone significant changes since his 2019 lecture.(Course6, Course7, Course8)
In this lecture, Dr. Uchiyama will explain the changes in the technique from the past and the points and cautions that are important to know for less invasive and more precise restorative treatment using a microscope.
In the case videos, Dr. Uchiyama will explain how to use materials and auxiliary instruments such as clamps, separators, and compression threads, which he actually uses in his clinical practice, through cases of occlusal surfaces, adjacent surfaces, and subgingival caries, which are difficult to approach.
He will also discuss the Comprehensive Abutment Procedure and the use of composite resin in inlays and table-top laminate veneers, so this lecture will definitely be useful for your clinical practice from tomorrow. Please watch this lecture.
[#1 Advantages of CR Restorations and Future Restorative Treatment]
What good can come from focusing on CR restorations? He also explained again about microscopes as a necessary element for high quality restorative treatment.
He will discuss the latest findings and techniques of CR restoration, which has undergone many changes in the five years since the last content was published.
[#2 Rubber Dam and Consultation]
He reviews the advantages of rubber dams, which are also useful in CR restorations, and explains the products used at Micro Dental and how to utilize them. He also introduces the points to keep in mind during the pre-treatment consultation and the knowledge of karyology that should be kept in mind.
[#3 Proximal Caries]
From here, we will discuss the three most difficult CR restoration patterns (contact, subgingival and occlusal) and advanced cases.
First, we will look at contact caries, from the importance of separation from adjacent teeth to each step of cutting and filling, with emphasis on key points. This is a valuable content to see the specific materials and techniques used in the video.
[#4 Flowable Resin and Instruments]
While showing the treatment of contact caries, he explained the performance of the latest floorable resin on the basis of his paper.
Dr. Uchiyama also introduced the other instruments used for filling, which are used by Dr. Uchiyama for precision treatment. The video shows how he performs a series of treatment and explains the treatment to the patient at the end of the treatment.
[#5 Cases that are difficult to separate between adjacent teeth and Anterior Teeth Cases]
We will discuss the chair, which is important for precise treatment, and look at cases of contact caries that cannot be released and cases of anterior teeth. He explains how to avoid grinding adjacent teeth as much as possible and the CR filling method that minimizes the use of strips and values the original tooth morphology.
[#6 Subgingival Caries]
This section describes the difficult subgingival caries. The use of a compression cord under a rubber dam makes subgingival treatment possible and prevents pulp extraction and tooth extraction.
Again, we have a detailed explanation of the equipment used and the detailed technique.
[#7 Occlusal Caries]
He talked about the bulk fill resin used in the treatment of occlusal surface caries, as well as the fundamentals, practice, and detailed techniques for creating occlusal surface morphology. Don't miss the video case study of how to create an aesthetic and functional occlusal surface without relying on the lab side.
[#8 Various Advanced Cases]
The last part of the presentation will be a combination of the previous patterns and cases in which CR restorations have been combined with other treatments. CR restorations are less invasive than other restorative techniques and can be performed without compromising esthetics. Dr. Uchiyama explained how he established his treatment approach.
